 [d]
[d]
Copyright © 2005-2008, Kimberly Chapman. All knitting graphics/patterns/instructions on this page were created by Kimberly Chapman. You may link to this page, but please do not steal/hotlink the graphics or copy the patterns to other sites without my written permission. Feel free to print graphics/patterns/instructions for personal or non-profit use, but absolutely no for-profit reproduction is allowed, including selling of finished items (except for registered charitable causes). Pop culture characters are shown as fandom tribute only and no profit is derived from them.
 [d]
[d]
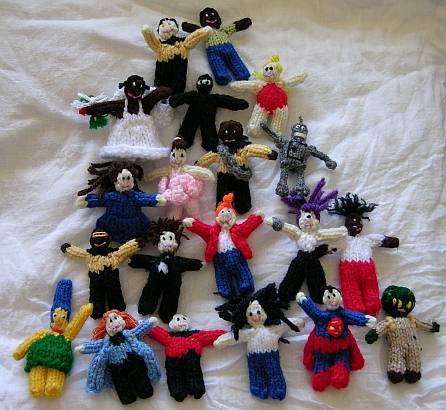
I created these little dolls for my infant daughter to give her something easy to play with in her tiny hands. They are very baby-safe as long as everything is tied well internally. Originally I made plain people, but eventually I enjoyed the challenge of replicating pop culture figures within the confines of the basic pattern.
Yarn: worsted weight acrylic, mostly Red Heart Super Saver, Caron Perfect Match, Caron One Pounder, and Red Heart TLC Essentials.
Needles: US size 1 double-pointed needles (see my double-pointed needle tutorial to learn how they work)
First Leg: cast on 6 stitches (2 on each needle). Knit around for eight rows (change colour if desired for shoes, shorts, etc.). Break yarn and remove from needles (use a stitch holder if necessary, but I find just treating it gently and setting it aside is fine without ever having dropped a stitch). Set aside.
Second Leg: as first leg, but do not remove from needles or break yarn.
Feed the first leg back onto the needles as shown in the photo below (put the last knitted stitch on what would otherwise be the next needle to knit with, then three more, then put the remaining two stitches on the free needle):
 [d]
[d]
Continue knitting from where you left off with the second leg, now incorporating the first leg. You will now have 12 stitches. Knit around once, tying the tail from the first leg to the feed yarn as you pass it, just to keep things bound together. Slip two of the stitches from the needle that has six onto the one that has two, so each needle now has four.
Knit six to eight rows around, depending on the height of your Little Dude. Change colour as desired to separate pants and shirt.
Using a tapestry needle, pull the tails from the bottom of the feet up through the legs and into the torso. Using either those tails or whatever tail in there that matches the crotch colour, place at least one stitch through the crotch to seal it up (you might want to do extra if it looks like there's a big gap). Then K2tog around (6 sts). K2tog around again (3 sts). Break yarn with about a one-inch tail. Using a tapestry needle, pull the yarn down into the body.
Using a tapestry needle, pull the end of your head colour yarn down into the body. Continue knitting, now using the head colour. Knit around one row. Knit front and back (aka increase by one) around (6 sts). Knit front and back, K1, repeat around (9 sts). Knit one row around. K2tog, K1, repeat around (6 sts). K2tog around (3 sts). Break yarn and feed through remaining three stitches, pull tight and use tapestry needle to pull end back into the head.
Using shirt colour (or skin colour for bare arms), cast 2 stitches onto each of 2 needles for a total of 4 stitches (you will not be using the fourth needle for the arms), being sure to leave at least 4-6 inches of tail to sew with later. Knit a total of seven rows around, changing colour where desired for sleeve length (don't tie knots as they will poke through...just pull first colour's end down through the arm with a tapestry needle, then do the same with the skin colour end, similar to with the head above). K2tog (2 sts). Break yarn and pull through, then feed down through arm using tapestry needle.
Using the tail at the bottom of the arm, sew it onto the body. It is advisable to make the stitches small but lots of them so they don't show up but the arm is on well enough to withstand toddler tugging.
Being horrible at embroidery, I keep it simple: I tie a knot in some black floss (white for black people so it shows up), feed both ends through the front of the head, stitch around the back of the head back out to the other eye, tie another knot, then sew back through to the back of the head again. Snip off the excess, and if you're putting on hair don't worry about being able to see the black floss. If you're making a bald person, you'll have to do it more neatly and keep the stitch between the eyes inside the head.
For the mouth, come in from the back of the head with pink floss. Make one stitch on an angle downward, sew under some of the head where the bottom of the mouth will be, stitch up on a matching angle for the other side of the mouth, come back through the bottom of that stitch with the needle, make the bottom of the mouth stitch, go back through the bottom of your first stitch and out the back of the had. As with above, snip the excess, but if the Dude is going to be bald, you'll have to do it all neatly so there's no pink sticking out of the back of the head.
Important: do the facial features first! The hair will cover up the ends of the floss on the back of the head.
There are many ways to do hair. You can cut lengths of yarn or floss and feed them through the head with a needle, tie them, and have rag-doll-style hair. You can stitch a length of yarn repeatedly up and down on the back of the head, then a few loops in front as bangs. You can make several loose loops at the back of the head, then tie/stitch them securely, then snip them open as a pony tail. You can make a braid and sew it on. Use your imagination!
To made a skirt or dress, start the legs as above but on the sixth or seventh row, change to the colour of the dress (unless you want them to have a naked bum under the dress). Do this for both legs.
When you get to the torso part, knit two or three rows around (two for a short person, three for a taller one). Break the yarn.
Depending on how wide you want the dress, either slip everything off of the size 1 needles or, as I prefer, use some size 3 needles. Cast on however many stitches you want relative to the size of the dress. The more you start with, though, the more you'll need to reduce at the waist. A good first dress is 18 stitches (6 on each needle) on size 3 needles.
Knit around a few rows, depending on the length of the dress. When it's almost long enough, K2tog in an even pattern to reduce down to four stitches on each needle (for the example above with 18 stitches, K2tog K1 repeated around).
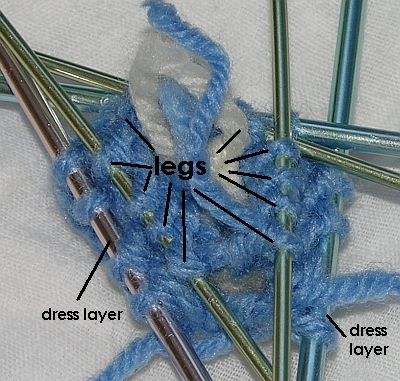
Put the legs down into the skirt so the needles are all lined up (see photo below) with the last knitted stitch of both the skirt and the legs beside each other.
 [d]
[d]
With the free US size 1 needle, go around and pick up alternating stitches from the two sets of needles so you'll end up with 8 stitches on each of the three size 1 needles, with the stitches alternating between leg stitches and dress stitches (see photo below).
 [d]
[d]
Knit around once, tying the dangling leg break-off yarn to the feed yarn for extra stability. K2tog around once (4 on each needle). Continue torso as normal, keeping in mind the total row count from when you joined the legs.
I'll be posting patterns for some of the specific Dudes soon. Sign up for the email alert group at the bottom of this page if you want to be notified of when the patterns are available.
Click on the photos to see a larger version.
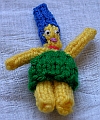
Marge Simpson
 [d]
[d]
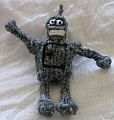
Bender
 [d]
[d]
Rogue
 [d]
[d]
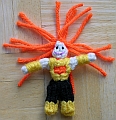
Jean Grey/Phoenix
 [d]
[d]
Storm

 [d]
[d]
Gambit
 [d]
[d]
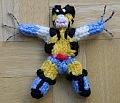
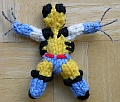
Wolverine
 [d]
[d]
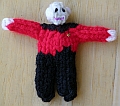
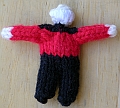
Captain Jean-Luc Picard
 [d]
[d]
 [d]
[d]
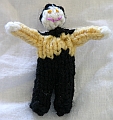
Lt. Commander Data
 [d]
[d]
Lt. Commander Geordi LaForge
 [d]
[d]
Yoda
 [d]
[d]
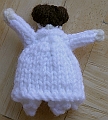
Princess Leia

 [d]
[d]
The Wiggles - Murray, Anthony, Greg, and Jeff
 [d]
[d]
Captain Feathersword

 [d]
[d]
Dorothy the Dinosaur

 [d]
[d]
Wags the Dog
 [d]
[d]
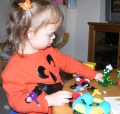
Peo With Her Wiggly Little Dudes
 [d]
[d]
Made with permission from The Biscuit Brothers. A set for Peo, plus extras made as gifts for the cast members.
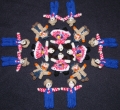
The Biscuit Brothers, Buttermilk, and Tiny Scarecrow
 [d]
[d]
The Biscuit Brothers, Dusty and Buford (Buford has the red hankie in his back pocket)

 [d]
[d]
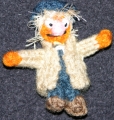
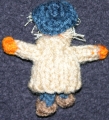
Tiny Scarecrow (bigger version of him here)
 [d]
[d]
Buttermilk

 [d]
[d]

Use this link to view this page with my preferred colour and font settings.
Page last updated November 28, 2009.
Email me at crafts@kimberlychapman.com
If you want to receive notification of updates on any portion of this site, simply enter your email address here and click/select the button to enter. You will be required to sign up for a free Yahoo! account to complete registration. Please note that Yahoo!'s privacy policy and other management are outside of kimberlychapman.com's responsibility. Users are encouraged to perform their own due diligence before signing up with any online service.
To find out more about the list or read messages without signing up, please visit the Yahoo! page for the kimberlychapman updates mailing list.
For more information on what these tags mean, please see About KimberlyChapman.com.