


All beading graphics on this page were created by Kimberly Chapman, and are my exclusive property. Feel free to link to this page, but please do not steal the graphics and pictures. It took hours of work to make them. If I find them elsewhere on the Internet, I will consider pursuing legal charges against the site owner.
This is how to make basic petals and leaves using the French flower beading technique. Some patterns require other techniques such as loops, the four-row crossover, etc. Remember, as with all of my pages that have a black background, you can view these instructions in your default font and colours with the link near the bottom of the page.
Before starting, ensure that you have plenty of beads on a spool of 24 or 26 gauge wire (green, gold, or other colour, depending on what you're doing). You can use a bead spinner to help you get the beads on the wire. You should have several feet of wire filled with beads for most leaves and petals. It is better to have too much on the wire than too little. Do not cut the wire off of the spool until the petal/leaf is finished, unless you must do so in order to add more beads.
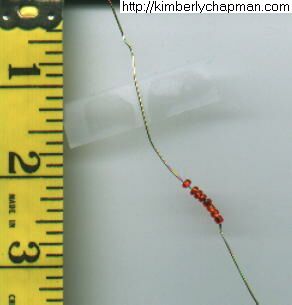
From your prepared feed wire (the wire on the spool), separate the starting number of beads for your petal/leaf. If a pattern says something like, "5 bead basic, round top round bottom (RTRB), 9 rows" this means start by separating 5 beads. In the example pictured, we're using 8 beads to start. Bring the starting beads within a few inches of the end of the feed wire. If you are not used to handling beads like this or are prone to spilling beads, make a twist in the top of the wire to prevent the beads from spilling off. |
|
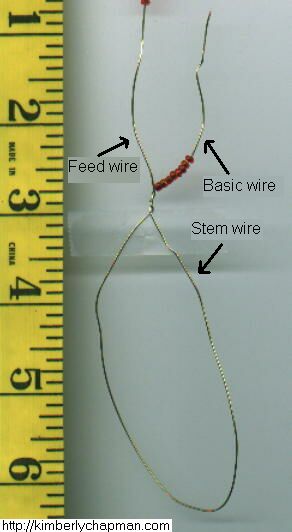
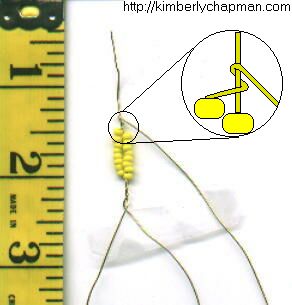
Make a large loop of bare wire under the separated start beads, and give it a few twists just below the separated beads. This loop will form the stem of the petal/leaf. Henceforth, the portion of the wire with the initial separated beads, going up to the end, will be called the basic wire. |
|
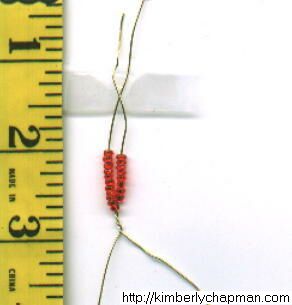
Now bring down some of the beads from the feed wire and line them up snugly against the beads on the basic wire. |
|
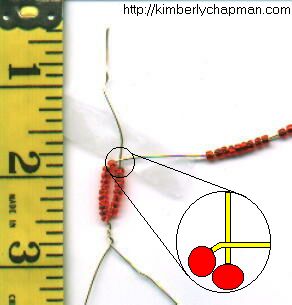
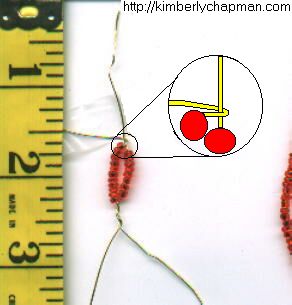
Bend the feed wire across the front of the basic wire such that it holds enough beads to continue to fit snugly against the basic beads. |
|
Wrap the feed wire around behind the basic wire, trying to keep it as close to the beads (down on the basic wire) as possible, if you are making a round top. If you are making a pointed top, see the instructions at the bottom. |
|
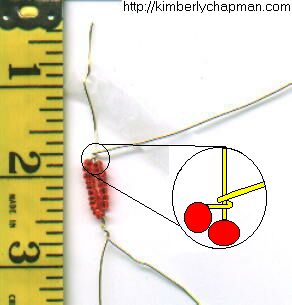
Continue to wrap the feed wire all the way around the basic wire. You are making a complete loop, as flat as possible for a round top. |
|
Now bring down more beads from the feed, and once again line them up snugly against the basic beads. As you did on the top, bring the feed wire across the front of the stem wire. |
|
Wrap a loop of feed wire around the stem wire just like you did at the top. Then bring in more beads from the feed wire and go back to the top. Repeat these steps for as many rows as the pattern calls for, counting the basic wire as a row. You may need to twist the stem wire loop closed more as you work your way down it. |
|
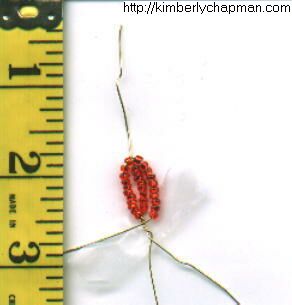
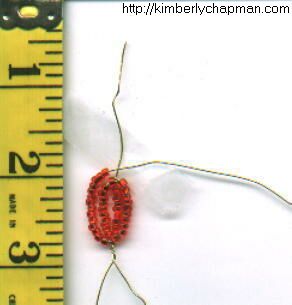
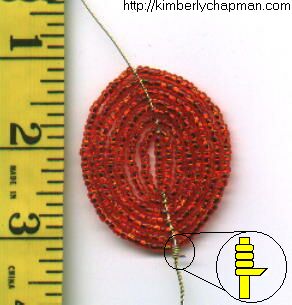
Here is a 15-row petal, seen from the back where the basic wire is exposed. On the last row, wrap the feed wire tightly around the stem wire several times, then snip it with wire cutters. To prevent the wire from snagging other petals, cloth, or even skin, be sure to flatten it down against the stem wire with a pair of needle nose pliers. |
|
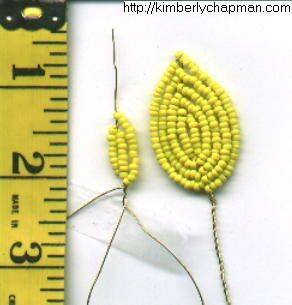
To make a pointed top instead of rounded top, simply change the angle of the wire as you wrap it. Instead of keeping it a flat loop against the beads, make a 45-degree angle with the loop. |
|
Then add beads just like with the rounded top. A finished 9-row yellow pointed petal is shown. |
Don't like my colour and font style? View this page in your default settings.
Page last updated December 4, 2003.
Email me at crafts@kimberlychapman.com
If you want to receive notification of updates on any portion of this site, simply enter your email address here and click/select the button to enter. You will be required to sign up for a free Yahoo! account to complete registration. Please note that Yahoo!'s privacy policy and other management are outside of kimberlychapman.com's responsibility. Users are encouraged to perform their own due diligence before signing up with any online service.
To find out more about the list or read messages without signing up, please visit the Yahoo! page for the kimberlychapman updates mailing list.
For more information on what these tags mean, please see About KimberlyChapman.com.