Reaper Link: 6056: Orc Command
A little orcish band. The first one I did was the guy with the horn. The bases have crumbled bits of craft moss glued on them for a grassy effect. I decided to co-ordinate their outfits, because as we all know, orcs are very style-conscious that way.
Reaper Link: 2225: Skeleton Archer (single only, discontinued)
A skeleton warrior, one of six identical ones (again, you know how fussy those monsters can be when it comes to fashion management). The boots and a few other areas were brushed after sealing with a gloss glaze to give them a shine, although it's hard to see in the scans. Bow-bearing miniatures don't seem to come with strings. Not sure what other miniature painters do, but I've been adding a bit of 32-gauge wire from my beading stocks.
This is from the Munchkin set. Isn't she something? A wonderful parody of the tendency in RPGs for men to get full armour while women are expected to get the same level of protection from chainmail bikinis. She's got some cleavage, doesn't she? And a butt you could bounce gold pieces off of...although I suspect she'd gut you with that big sword of hers if you tried. I know one cornea isn't quite round...I just couldn't get it to go evenly. Oh well. Even leather babes can't be perfect, I guess!
And yes, the red tips on the nipple studs were deliberate. If you're going to highlight boobs in parody, may as well go all the way!
This is what I'm using for now as my half-orc barbarian character Lyeyk, even though the miniature looks far more human than half-orc. But that's why her skin is grey-blue, because that's how I pictured the skin of Lyeyk. Lyeyk also should be much more stout, but good luck finding a non-skinny woman miniature!
As usual, this female miniature came wearing hardly any clothes, so I painted on the t-shirt under the armour (which foolishly fails to cover her gut). I also did not put on the shield she came with because Lyeyk uses a two-handed greatsword. I painted her purse as a sporran, and the base is covered with crumbled craft moss.
Reaper Link: 2481: Goblin Warband
This is one of four goblins that came in a pack. Rather silly of him to wear such brightly-coloured armour, but our characters will just have to enjoy killing him as such. Over and over again. It's also rather foolish of him to be extending a bow with no string and now arrow, not to mention that if there was a string (and, in fact, the reason I didn't add one), he'd hit his own head with it by holding it at that angle. Tsk tsk, those goblins never learn.
His base was too small to be stable, so I made it larger using polymer clay, which I painted at the same time as the rest of the base for a better overall fit.
I call this guy Fu Man Chu because of the long goatee, not because he's particularly Asian. I added some detail to his skirt and shield, and the base is covered with crumbled natural craft moss.
This is the Unnatural Axe Warrior Wench from the Munchkin set. I just love her smiley face shield, and that axe certainly is unnatural. I did her bodice armour in metallic red, but it's hard to tell it apart from the red skirt below. I covered the base in fine beige sand, glued down in several layers.
Reaper Link: 2481: Goblin Warband
This is the second goblin of a set of four. He was my first real work in terms of making the armour look older, and the sword bloody.
I call this one Tattoo Man because I decided to go nuts and paint itty bitty tattoos and decorations all over him. He has a blue tattoo on his chest and a black one around his left arm. His shield is intricately decorated, as his is axe. He also has a sporran, as with the other two that came with him above. And I turned his skirt into a kilt by painting on all of those lines and dots individually. Finally, his base is covered with crumbled natural craft moss.
Yup. I'm insane. Cool, huh?
The original Super Munchkin, part of the Munchkin set. I did most of the patches on his backpack randomly because I couldn't make writing that small, but I did take the time to make one an alien head and another a smiley face. The chainsaw says Orc-B-Gone, which was pre-etched into the miniature and can also be seen on the original drawing for the card game.
Reaper Link: 2481: Goblin Warband
These are the final two of a set of four goblins, with the others individually above.
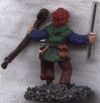
Reaper Link: 2545: Fitch Coincatcher
This is the miniature for Carriarg, my husband's character in the game I run. Carriarg is a Palladium-style kobold, which is quite different from a D&D style kobold. D&D kobolds are dog-like, while Palladium kobolds are somewhere between a gnome and a dwarf, with pale, waxy skin and yellow eyes. Since no such miniature exists, he chose a halfling rogue and we make do. He chose the colours and I painted it for him.
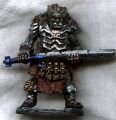
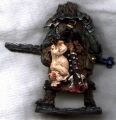
Reaper Link: 2537: Orankar, Ogre Boss
This large miniature was called an ogre boss on the package, but he served as our generic ogre, large orc, giant, troll, or anything else big and chunky until we eventually got more big types. Now we tend to call him Grablock after one of his more memorable episodes. His sword was pretty beat-up looking originally, but in filing the flash and seams, I also accentuated the notches in the sword. He also has some minor tattooing on his arm. I'm pretty proud of the gore on the dead pig hanging on his belt...I decided if you're gonna hang a pig from your belt, chances are you brained the thing pretty well to begin with. It's a bit hard to see in this scan, but there's blood coming out of the pig's mouth.
Rate this mini at coolminiornot.com! (Pop up ads all originate from that domain, not kimberlychapman.com.)
Reaper Link: 2310: St Tarkus, Dire-Dead Inquisitor (discontinued)
This is a partially skeletonized undead cleric that serves as our generic evil caster/cleric/lich dude at the moment. It's a bit hard to tell from the scan angle, but I actually illuminated the page of the book, complete with a teeny little figure in the first letter space. I also gilded the edges of all of the pages, because I'm insane.
Reaper Link: 6050: Lizardman Warriors
These lizardmen are using bones as weapons and each have half of a turtle's shell as a shield. The set included four, two each of these designs. I'm painting the same ones more or less the same colours, so I've only scanned one of each. I tried to add the blood on the bone consistent with spatter as if the bone has been recently used, more than blood from having removed the bone from a living creature.
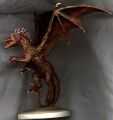
Reaper Link: 2457: Amber Dragon
This was my first dragon, and I did him goldish-bronze not because the miniature was originally labelled as "Amber Dragon," but because I needed a young bronze for a particular adventure at the time. However, until we have other dragons to use, this one serves all of our dragon needs within the games. I added red and green shading and highlights to the wing to give a bit of "aging" quality, keeping in mind the way metals tarnish. The original base was far too narrow to support the entire structure, especially with the heavy wings, so I made a wider polymer clay base fit to the original base, glue it on, and then covered it all with fine craft sand to make it look uniform.
Reaper Link: 2185: Mummy Rising
I love this little sarcophagus, more for the painting opportunities on the lid than the actual mummy. The photo of just the lid leads to an extreme closeup in order to examine detail. The designs for the most part were not imprinted on the lid, so I created them myself, partially based on actual Egyptian sarcophagi. The mummy is glued in place, holding the lid open.
Rate this mini at coolminiornot.com! (Pop up ads all originate from that domain, not kimberlychapman.com.)
Reaper Link: 2485: Neferu
Okay, in general I don't go for the naked fantasy boobs style. But I really liked this miniature, and I can buy the concept of a cleric being in a state of partial undress in a hot climate. I made her black/nubian partially out of a desire to do something unexpected, partially knowing Egyptian history that included a lot of powerful nubian women within religion, and partially to try to bring some multi-racial inclusion to our miniatures. Frankly, I think she came out pretty sexy, moreso for being black. I decided on a red/white combination to get away from the expected gold/blue Egyptian look. I gave her some Egyptian-style makeup, including blue eyeliner out to her temples, and red nailpolish, even on her toes. Then I glued sand on the base to complete the desert look.
A halfling wizard, part of the Munchkin set. I figured a goofy guy like this deserved a goofy paint job, complete with shiny robes and hat.
Reaper Link: 2450: Ghouls and Ghast
A ghast, with his bony spine protruding from the muscles on his back. I saw a horror mask coloured like this once, which is why I chose these colours. The skull still has an eyeball in it, so I painted it with bright red blood all over it instead of the typical aged-bone look I usually go for.
Reaper Link: 2450: Ghouls and Ghast
This ghoul is enjoying a tasty snack, probably graciously donated by a former party member. Muahahaha. I drizzled blood down his hand and arm to denote the extreme freshness of the meat.
Reaper Link: 2538: Lesser Elementals
These four small elementals came in a pack. The fire elemental is done with neon colours, although the scan doesn't show the yellow highlights very well. The earth elemental looks much better under my Ott natural-spectrum light, which makes the lava bits between the rock glow, as well as his yellow eyes. The scan did such a bad job of picking up his yellow eyes that I had to do some digital manipulation just to mark where they are at all. The wind elemental scanned much better, as did the water one. The water one is highlighted with silver to make her more shimmery.
Reaper Link: 1402: Magnus, Wizard of Hope
A wizard in blue, very Gandalf-like. The detail on the cloak was not imprinted on the original miniature at all; I added it for kicks. His eyes are so deep-set that they were a right royal pain to get to in order to paint, but I managed...not that you can really tell from the scan. I made his hat a bit beaten-up looking because aren't most wizards known for leaving their hats in places that get sat and tromped upon? *grin*
Reaper Link: 2392: Lizardman Shaman
This is a Lizardman shaman, originally intended to be used as a generic Lizardman in my campaign, but my husband has since adopted it for a Lizardman cleric in that game.
Reaper Link: 2585: Lindir Lightarrow, Elven Archer
This is my miniature for Jalryn, an elvish fighter that I hope to eventually turn into a bowmaster of some sort (probably deepwoods sniper). He's very Legolas-coloured, although his face-shape is actually kind of like Hugo Weaving as Elrond. I did extreme detailing on the bow on both sides, but it's really hard to see in the scan. I attached a green 32-gauge wire as a string, since the miniature didn't come with one. The hair is highlighted with "metallic champagne" to look more mystical.
Reaper Link: 2534: Kiri, Female Ninja
This is Mina, my human female rogue who I'm building up to be a thief-acrobat, so I wanted a miniature that looked nimble. This is actually supposed to be an assassin, but I chose it for the body type and the face covering, because that's the kind of thing Mina would wear. I deliberately did her all in muted, dark colours as is sensible for a rogue, but I love the ironic touch of bright red hair that makes her quite noticeable. For her eyes, I intentionally did the green parts bigger than normal because I wanted them to stand out as GREEN, and the effect is much better in real life than in the scan. The downside to making her a green-eyed redhead is I had to avoid all red, orange, and purple clothes; although red and orange were right anyway because of the darkness thing, purple would have been good for variety. But I've known enough redheads to know of their aversion to those warm colours, due to the complete clash with their hair.
Reaper Link: 2057: Pip Thistletoe
This is Flindgy, the gnome rogue I have going through the Temple of Elemental Evil. Problem is, nobody seems to make the right kind of gnome miniature for this character. So I took a halfling with the right kind of impertinent face, filed off the foot hair and painted his feet black like boots, and gave him a bow instead of the sling he came with. I also added bugle beads (attached with superglue on a wire that I inserted in his hand after first drilling through the fist) as a sort of wand, since Flingdy is the kind of character to pick up a magic item to see what it does. He has freckles, which look much better in real life. The base is covered in poppy seeds.
Reaper Link: 2088: Argus Stronghoof
This was my first attempt at anything horse-like. I'm quite happy with the colouring, although the scanner dulls the glow of the warm brown a bit. The stuff on the base are dried bits of heather, which I individually placed with normal PVC glue and tweezers - my first foray beyond simple sand or moss. The bowstring is a bit of 32-gauge green beading wire. The scan doesn't show it well, but his hair and tail have brown highlights over the black. I wanted to go for nice detail without making the guy himself too overly decorated, so I added detail to the bow and quiver, but kept the man/horse's body relatively unadorned. I didn't think this was the kind of guy to go for tattoos and such.
Rate this mini at coolminiornot.com! (Pop up ads all originate from that domain, not kimberlychapman.com.)
Reaper Link: 2399: Familiar Pack 2
This imp is from a Familiar Pack, which means he's really tiny. He had an empty hand, so I gave him a bit of mini ball chain I had lying around as a weapon to go with the wand he already had. I also put caraway seeds around the bottom to look like he's standing in a field of thorns.
Rate this mini at coolminiornot.com! (Pop up ads all originate from that domain, not kimberlychapman.com.)
Reaper Link: 2288: Garnuk the Ogre
I call this guy Donk, after a randomly generated name from pcgen that has become a general ogre name in our house. I deliberately painted his eyes slightly askew to give him a bit of a "duh" look. Note the skull tattoo on the shoulder. The dead grass bits are actually shredded tips of dried palm fronds from our backyard. They're very hardy and springy, even though they look fragile, making them excellent for use in play.
Rate this mini at coolminiornot.com! (Pop up ads all originate from that domain, not kimberlychapman.com.)
Reaper Link: 2009: Krupp the Heretic
Genoah is a miniature for one of our regular players, but she uses our miniature for him. Genoah is a druid, and I painted him to look like a hippie druid. Painting tie-dye is easier than it looks; I simply looked at a real tie-dye pattern and duplicated it. Tie-dye doesn't have to be even and regular, and in fact looks better when it's not. I did a search for other tie-dye miniatures when setting out to paint this, but the only one I found was a Tye-Die Liche with helpful hints on the page. I added a hematite bead in his outstretched hand and dried heather flowers to the base.
Rate this mini at coolminiornot.com! (Pop up ads all originate from that domain, not kimberlychapman.com.)


