


All beading graphics on this page were created by Kimberly Chapman, and are my exclusive property. Feel free to link to this page, but please do not steal the graphics and pictures. It took hours of work to make them. If I find them elsewhere on the Internet, I will consider pursuing legal charges against the site owner.
If you're going to do a lot of bead stringing or make French Beaded Flowers, you'll want a bead spinner, especially if you buy beads loose instead of by the hank (pre-strung). Bead spinners online cost as much as US$45 plus shipping. Cheap plastic ones are rumoured to be available at craft shops for about US$10.
But for the thrifty crafter, making your own bead spinner for free is even better. Plus, as you'll see, it re-uses plastic packaging, which is the positive environmental choice! I use mine all the time quite successfully, and I've made some for friends who are pleased with them as well.
You will need:
Tada! You should now have your own homemade, ultra-cheap bead spinner. And you were doing good for the environment at the same time. Doesn't that make you want to smile? :)
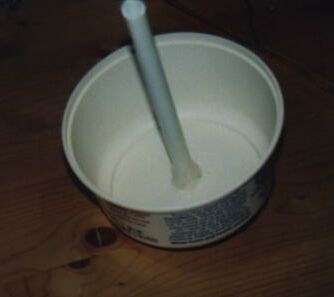
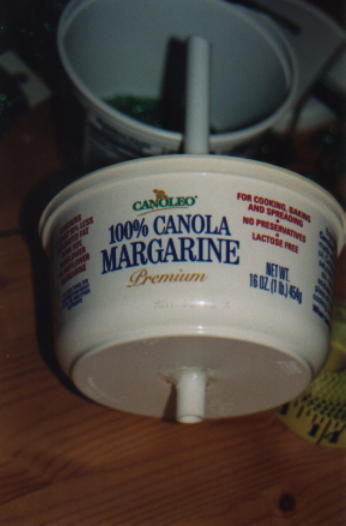
Here are pictures of the one I made:
If you like this idea and happen to also be a knitter/crocheter, you'll probably like my tutorial on making your own yarn ball holder out of reused materials.
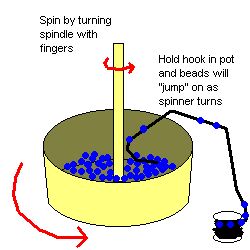
I keep getting questions asking me how to use the bead spinner, aside from making it. So here's a rough diagram:
Put a lot of beads in the spinner. If there's only a few grams' worth, it won't work well. You really want enough to cover the bottom of the spinner and then a few layers on top of that, at the minimum. Ideally, it should be about one-third to one-half full.
Turn the spinner by putting the bit of the spindle that pokes out the bottom on a scratch-safe surface and twirling the top of the spindle with your finger tips. Get it up to a reasonably stable, good speed by constant turning, but not so fast that beads fly out.
Now put the hooked end of your wire into the beads so the hook points opposite the direction of turning. In other words, the beads should be forced against the tip of the hook. This will cause them to "jump" onto the wire. It might take some practise to learn what is a good hook shape. Once the hook is full to your fingers, turn the wire over and dump the beads further down the wire, then do it again.
I've never actually used a spinner to get beads onto thread, but as I understand it, you use a long, hooked needle with the thread attached, and otherwise it's the same as above.
Use this link to view this page with my preferred colour and font settings.
Page last updated May 6, 2007.
Email me at crafts@kimberlychapman.com
If you want to receive notification of updates on any portion of this site, simply enter your email address here and click/select the button to enter. You will be required to sign up for a free Yahoo! account to complete registration. Please note that Yahoo!'s privacy policy and other management are outside of kimberlychapman.com's responsibility. Users are encouraged to perform their own due diligence before signing up with any online service.
To find out more about the list or read messages without signing up, please visit the Yahoo! page for the kimberlychapman updates mailing list.
For more information on what these tags mean, please see About KimberlyChapman.com.