Ceramics
These are the items I made in my ceramics classes at UNLV, listed in order of creation.
Beginner Class
 [d] [d]
|
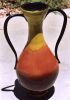
This was the first vessel I made. We cut out the side curve in cardboard and used that as a guide to ensure the pot was the same size and shape all the way around. The handles were particularly difficult to get so thin, and it bothers me that they aren't quite even. |
 [d] [d]
|
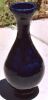
This was made with the same cardboard guide as the one above, but since one handle exploded in the kiln, I broke the other off for symmetry. I prefer the shape without the handles. |
|
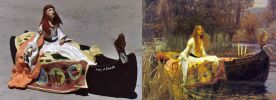
This assignment required us to take a painting and reproduce it as a box. I chose John William Waterhouse's The Lady of Shalott, which depicts the Lady as she casts off from the dock in her boat to die on the river as she approaches Camelot, as per the Lord Alfred Tennyson poem.
Many boxes in the class were constructed with the painting reproduced in relief on the front of a fairly standard box shape. I decided instead to build the box into the painting. As you can see from the pictures to the left, the Lady and her quilt lift off of the boat to reveal a small hidden box.
The patterns on the Lady's quilt were created using Jem cutters from my cake decorating supplies, a pounce wheel, and a lot of poking with the end of a blunt pencil. The entire piece was painted in acrylic paint as opposed to ceramic glaze in order to preserve detail.
Another feature of the assignment was to include an anachronistic or otherwise unexpected element, such as a political comment. I did so. See if you can find it.
I glued a small chain to her hand after painting.
You can compare the reproduction to the original painting below:
|
|
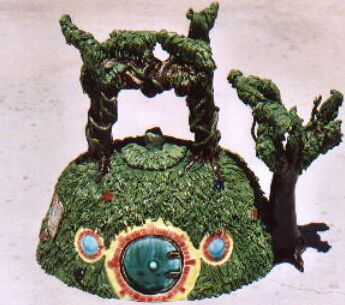
This assignment required us to take a character or symbol from popular entertainment and turn it into a teapot. I chose Bag End from the Lord of the Rings. I used images from the movies as well as classic paintings as inspiration.
We were required to have certain specific elements: a functional handle, a functional spout, and a removable lid. In this design, the trees on top form the handle. The spout is hidden in the brances of the side tree, as seen in the second last photo. The lid is in the grass below the tree-handle, with a small rose bush serving as a handle on the lid.
I wanted the "back" of the teapot to show a scene inside the house, although the glazes didn't turn out as dark as I hoped. However, the last photo on the left shows the detail of the ring sitting on the floor, waiting for Frodo to come retrieve it.
I'm not happy with the way the glazes melted together on this piece. If I did it again, I'd paint it with acrylics instead, as I did with the Lady of Shalott above.
|
Advanced Class
|
This was a simple project I worked on while waiting for more complex projects to firm up in between layers, stages, etc.
|
|
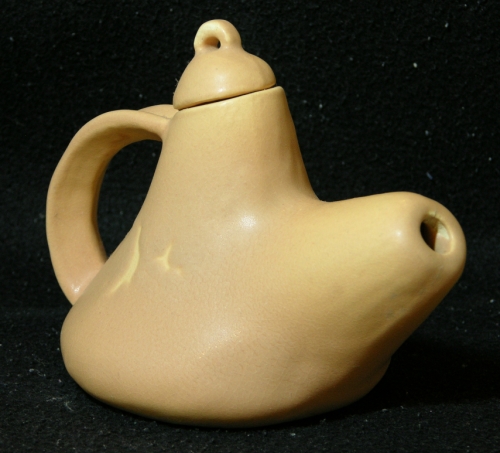
For this assignment, we had to make a preliminary mold of a shape without knowing what we'd later be using the shape for. My instructor said my shape was probably too small and that I'd be unhappy with it later. On the contrary, I was quite pleased when the first assigned use for the shape was a teapot. I used the basic bell shape for the body of the teapot, did another partial bell for the spout, and cut two strips from the lower part of the bell shape to form the handle. My only regret is that the glaze turned out chunky and blotchy.
|
|
To prove my instructor wrong insofar as the claim that the mold would be too small as mentioned above, I went further and made a second teapot, going as small as I could while still allowing it to pour (I had to stuff the tiny spout with wax to prevent it from being plugged up with glaze). Every element of this tiny teapot is from the mold; the body is from the tip of the bell-shaped mold, and the spout and handle are each one of the curves in the mold. The second photo shows a US quarter beside the teapot to give scale.
|
|
For a third project using the mold, I made what it looked like most: a bell. I used a maple leaf cookie cutter for the bottom opening. Again, the glaze turned out chunky and uneven.
|
|
The next assignment was that we were randomly paired with another student and had to use their mold to make another teapot. I made two using the other student's torus mold; one a free-standing torus with slightly flattened bottom and only a small cut for a spout and a tiny circular lid, and the other a torus base with a half-torus handle and a snub spout.
|
|
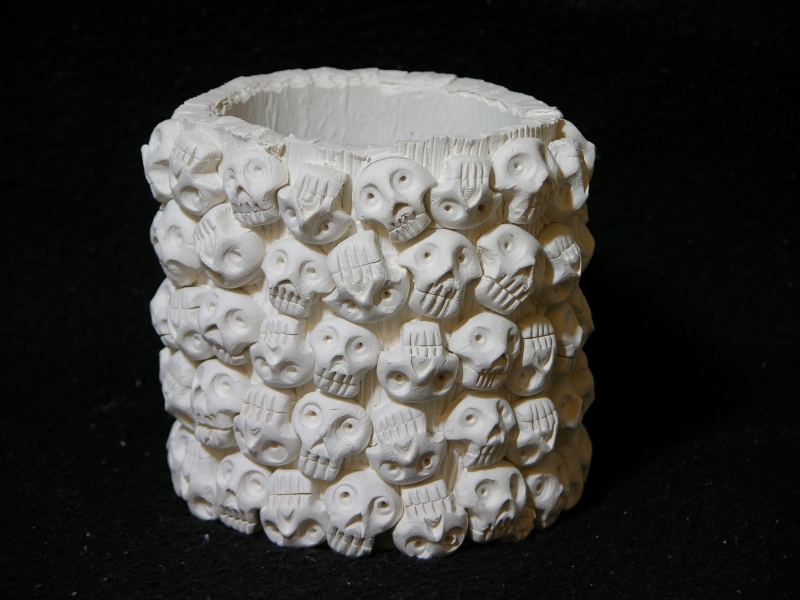
This was another diversion while waiting for other pieces to firm up during construction. The skull was in the university's mold collection; I did not sculpt it myself. I made the finger bones to serve as a handle. I'm very happy with the glaze colour; it was a watered-down brown underglaze, followed by a rubbing to clean the high points, then with a clear coat glaze on top.
|
After the Beginner and Advanced classes, I next embarked on two sessions of indepedent study to work on Klein bottles - or rather, three-dimensional interpretations of Klein bottles since a true Klein bottle is a two-dimensional topological space. I began by making tube molds using tubes from a hamster cage set; one straight and one curved. With those, I could then mold whatever curved or straight tube I needed, and if the original curve didn't suit the project, I could easily cut segments out or add wedges in to tighten or expand the curve respectfully. Then I made a funnel-shaped mold that could be cut as necessary to create the "inner" connection point for the bottles. I also used a variety of pre-existing molds from the university's mold library, partly for variety and partly to demonstrate that any shape of sufficient size can be turned into a Klein bottle.
I made one more that isn't shown, because it was out of reach the day I took the photos. It will be added at a later date.
They are unglazed at this point because after completing the initial firing, I had a baby and haven't had a chance to get back to the studio to do glazing. Also, given my bad luck in glazing previously, I admit I'm a bit hesitant to potentially ruin the pieces with a poor glaze job. So for now they will remain bright white.
To see some lovely glass Klein bottles, please visit Acme Klein Bottle.
|
As I began planning the Klein bottles, the other students were confused as to what I was making. To illustrate the basic shape of the Klein bottle, I made this split-view version. Below is what this Klein bottle looks like as a whole.
|
|
I used this basic mold shape to begin constructing Klein bottles. The "split" one above uses the same mold, just cut in half.
|
|
For this football-like shaped mold from the university's mold library, I chose to put the hole on the front and the tubes in back. Unfortunately, it turned out that the clay had been tainted with glaze, so some glaze spots have bubbled through, marring the surface.
|
|
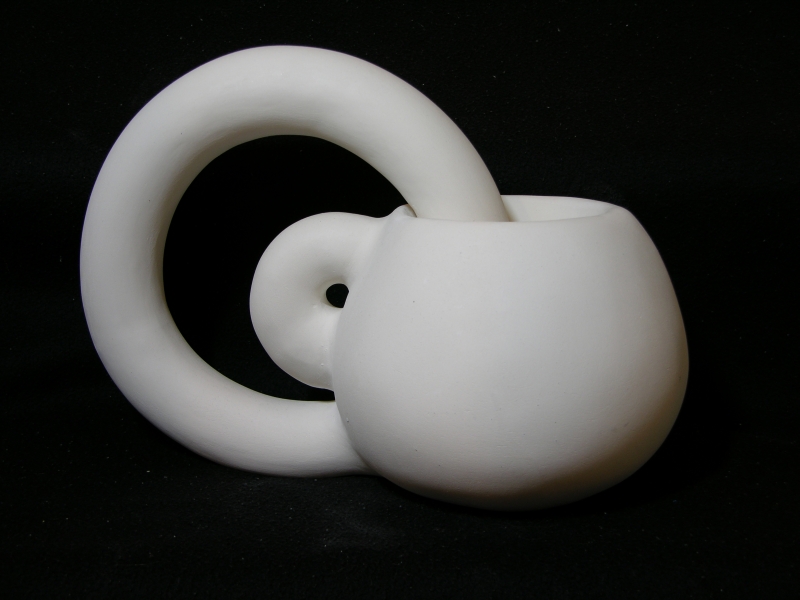
For this Klein bottle, I first constructed a torus using the hamster tube molds, then joined the torus at the top and front of a teardrop-shaped mold from the university's library, with my funnel mold inside the teardrop and coming out the bottom. The attached torus makes this a more mathematically complex shape.
It took some amount of planning, skill, and attention to detal to ensure that the very bottom of the torus remained separate from the tear drop shape, because if they connected, the mathematics of the shape would be different.
|
|
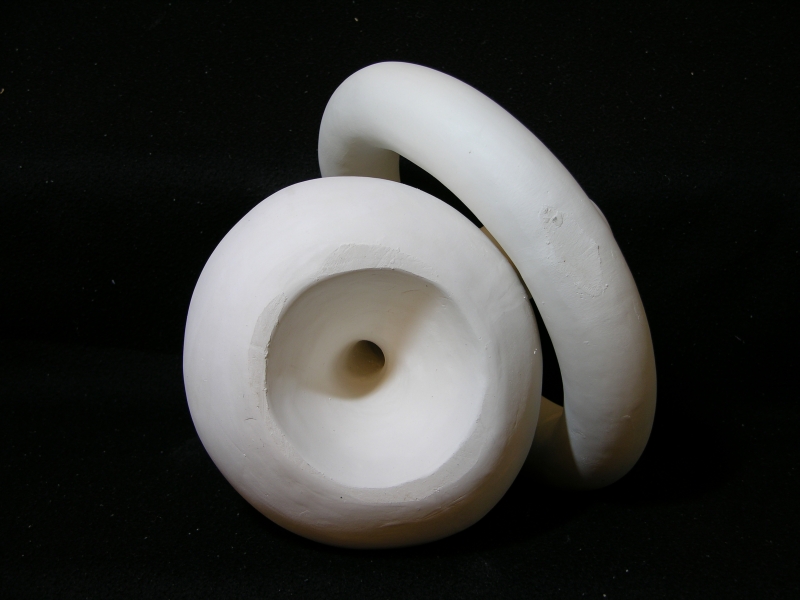
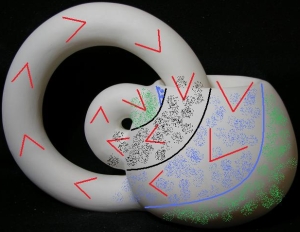
This version of a Klein bottle is called an Ouslam Vessel because the tube loops back in on itself (the name comes from a mythical bird that flew in ever-decreasing circles until flying up it's own backside). The link provided shows cutaway diagrams, but here is the pot itself with cutlines shown to illustrate how it works on the "inside":
If you follow the red arrows starting at the funnel (blue zone), you can see how they move into the outer tube, then back through the funnel (black zone inside blue zone) and out again to form the inner tube, which then opens into the actual cavity of the vessel (green zone).
This was a particularly tricky pot to construct, because it was difficult to choose which portion to attach at which point, since no matter the order, something was going to be in the way of something else. A lot of the interior work was very cramped and challenging, but it came out nicely in the end.
|
|
This cylinder mold was from the university's mold library, but to create a more interesting Klein-like shape, I put the funnel in front and looped the tube around the entire piece before reconnecting. When I planned the piece and began working on it, I was told repeatedly by other students and some instructors that firing such a shape in one piece was impossible. However, through good use of waste-clay support structures, I proved them all wrong and fired it as one piece.
|
|
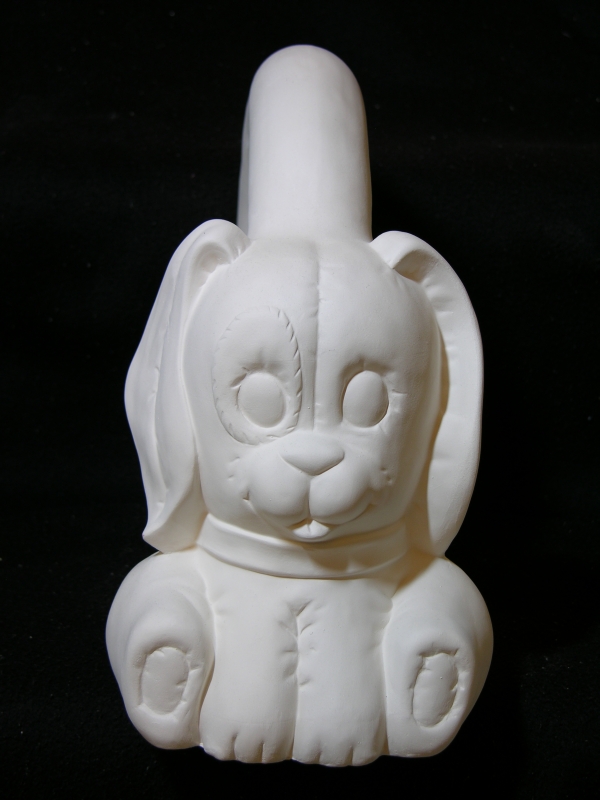
This last piece was made quickly while waiting for the long tubes of the above Twisting Klein Bottle to firm up. I call this "Baby's First Klein Bottle", since I was pregnant while making it and selected the mold from the university's library purely to demonstrate that any shape can be easily modified to form a Klein bottle. I have been meaning to paint this one black and white on the puppy and in rainbow shades on the tube to exaggerate the cuteness.
|
Links
- David Burnham Smith - Stunningly gorgeous work with incredibly fine detailed glaze patterns. Several pieces are so beautiful that they literally took my breath away.
- Jared Jaffe - formerly a student/instructor where I took ceramics classes. Some really beautiful teapots here.
I also made a sugarcraft cake for the ceramics class, which can be viewed in the cake gallery.
Back to the Crafts Page.
Back to kimberlychapman.com.
Don't like my colour and font style? View this page in your default settings.
Page last updated December 31, 2007.
Email me at crafts@kimberlychapman.com
If you want to receive notification of updates on any portion of this site, simply enter your email address here and click/select the button to enter. You will be required to sign up for a free Yahoo! account to complete registration. Please note that Yahoo!'s privacy policy and other management are outside of kimberlychapman.com's responsibility. Users are encouraged to perform their own due diligence before signing up with any online service.
To find out more about the list or read messages without signing up, please visit the Yahoo! page for the kimberlychapman updates mailing list.
For more information on what these tags mean, please see About KimberlyChapman.com.
 [d]
[d] [d]
[d]