 d
d
Main Cake Page - Cake Gallery - Discworld Tutorial - Orc Head Tutorial - Shelob Tutorial - Books - Links
This was my Show Cake entry in the 2010 That Takes the Cake! Sugar Arts Show and Competition, Austin TX. It won First Prize and was seen on Austin's Channel 8 News. But the accolades that excited me most were from the great decorator and show judge Mike McCarey of Mike's Amazing Cakes, who gave it much praise and signed my show apron with a note that said, "Your cake was 'amazing'!". Here he is looking at the cake, and then with me:
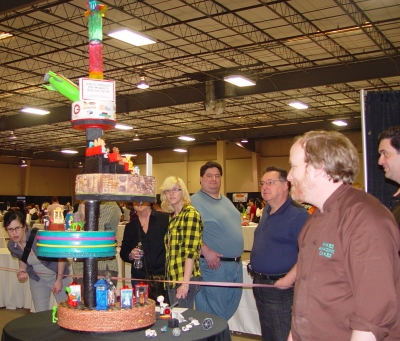
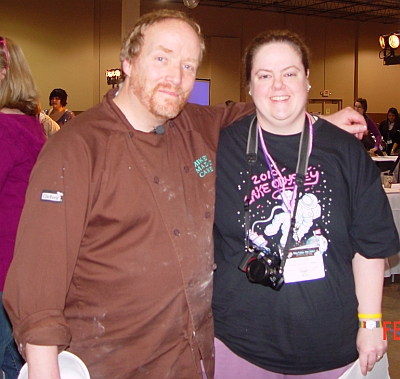
There are some professional photos at the end of this page, and it has been featured in several people's Flickr accounts as well (DVD Tracker's set is particularly good and includes explanatory notes).
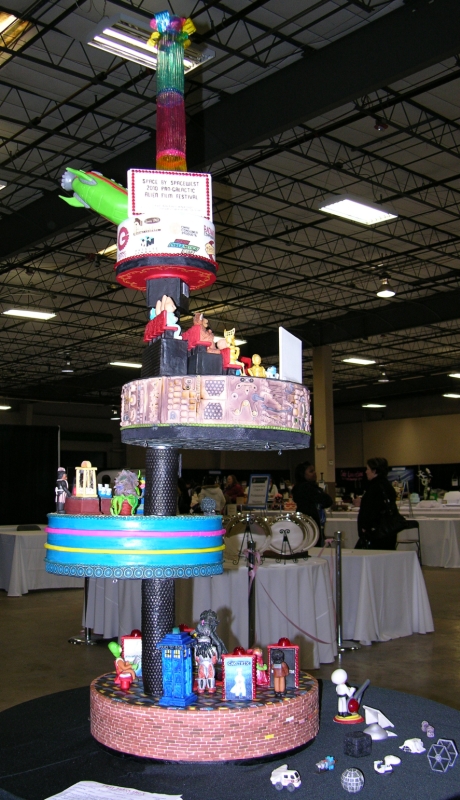
The idea came from hearing that the show's theme would be "2010: A Cake Odyssey". At first, I thought that meant that it would have to incorporate the movie "2010" somehow, so I decided it would be fun to have a bunch of other movie and TV aliens coming to see "2010". Then I found out that the theme was anything pertaining to science fiction or fantasy, so I stuck with the theatre idea but expanded it to be a film festival. I decided to have them watch "Plan 9 From Outer Space" because of that film's legendary status as the best worst movie of all time. My husband came up with the joke of calling the festival "Space by Spacewest" based on Austin's "South by Southwest" media festival.
I experimented with a lot of new techniques for this piece, including gummy, gelatin, hot sugar cutting, Jolly Rancher molding, tiling, inlay, and caning. I will be doing demos of some of the techniques used at future Capital Confectioners events.
Here is a full list of the movies and TV shows represented on this cake:
|
|
|
There are a lot of photos, including many of pieces being made, so please use the following links to help your navigation:
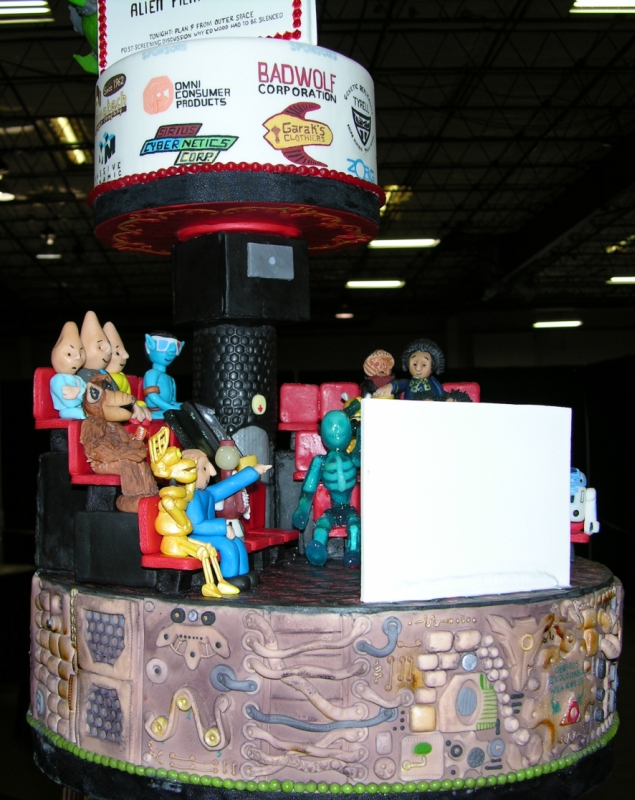
These photos show the entire cake from various angles. I forgot to measure how tall it was, but I had to stand on a small stepladder just to place the gelatin "lights" inside the marquee at the top, so it was pretty tall.


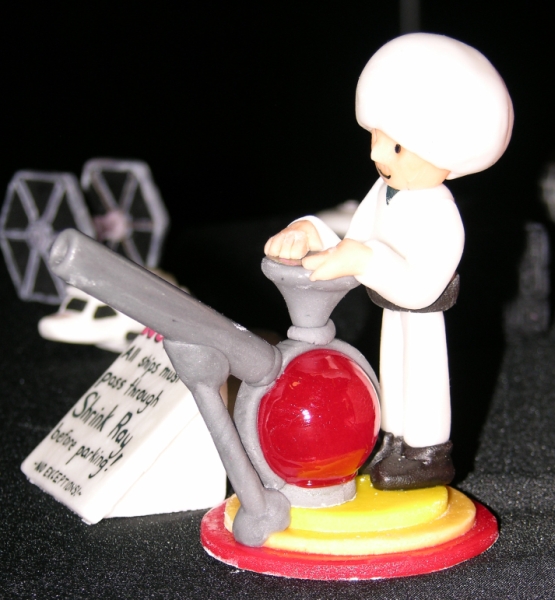
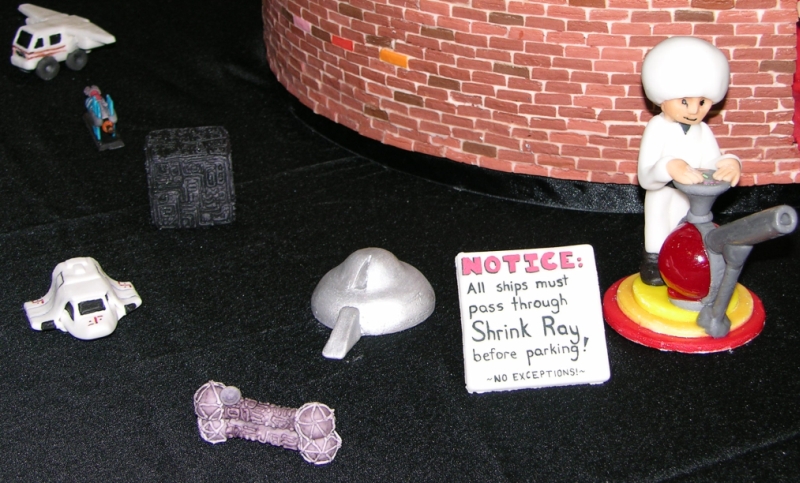
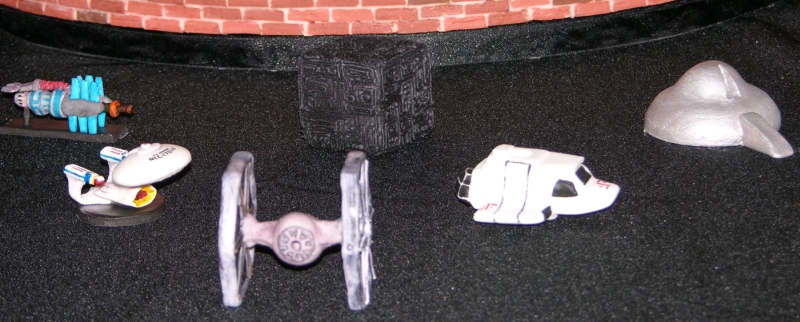
Show Cakes are judged in part on table decorations, so I made several small classic ships to go on the table. In order to explain why they were all so small and roughly the same size when their "real life" versions would vary widely in scale, I defined the table area as a parking lot. I then built a self-designed Shrink Ray gun with a Spaceball guard manning it, and posted a sign requiring that all ships pass through the Shrink Ray before parking. The red ball in the Shrink Ray is six cherry Jolly Ranchers melted together and hand-rolled into a ball.
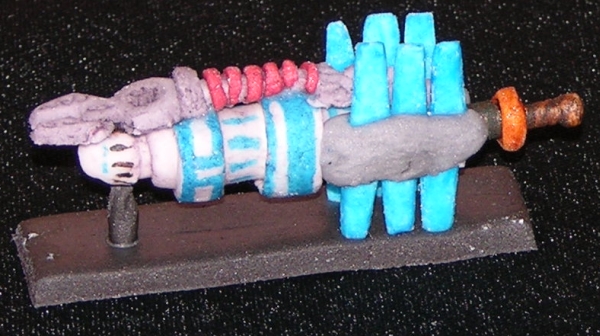
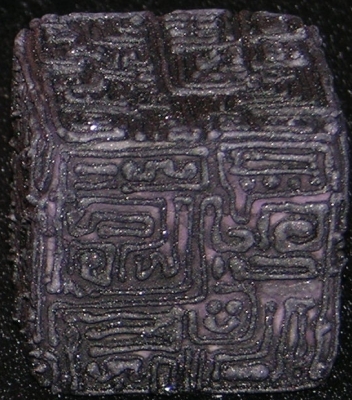
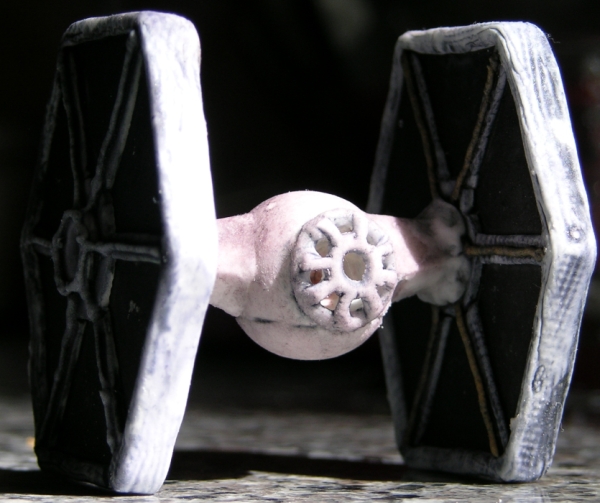
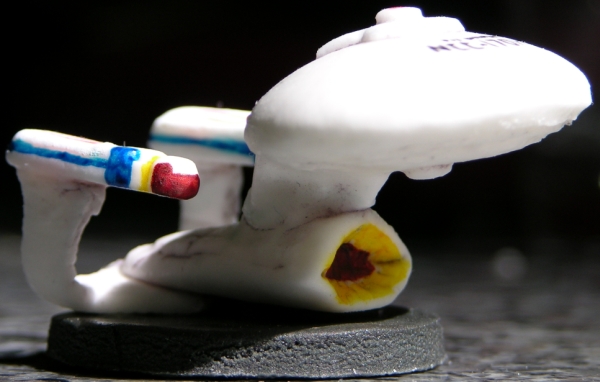
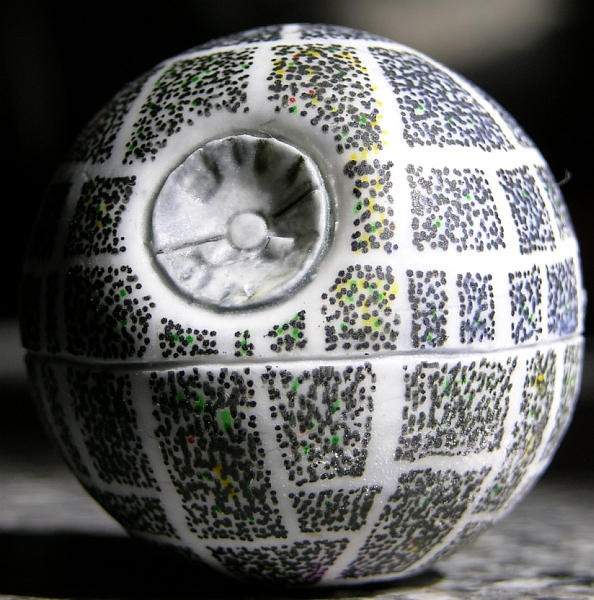
The ships are: Borg Cube (Star Trek), Enterprise (Star Trek), Satellite of Love (MST3K), Klaatu's Ship (The Day The Earth Stood Still), Visitor Transport (V), Babylon 5, Tie Fighter (Star Wars), Death Star (Star Wars), and Lone Star's Winnebago (Spaceballs). The Winnebago does have its trademark bumper sticker, although I didn't write out what it actually says (I heart Uranus) so I didn't risk running afoul of "family friendly" requirements in the show rules. The Borg Cube has a smiley face hidden on it. More views and closeups of the ships can be seen below in the ships section of In The Making.
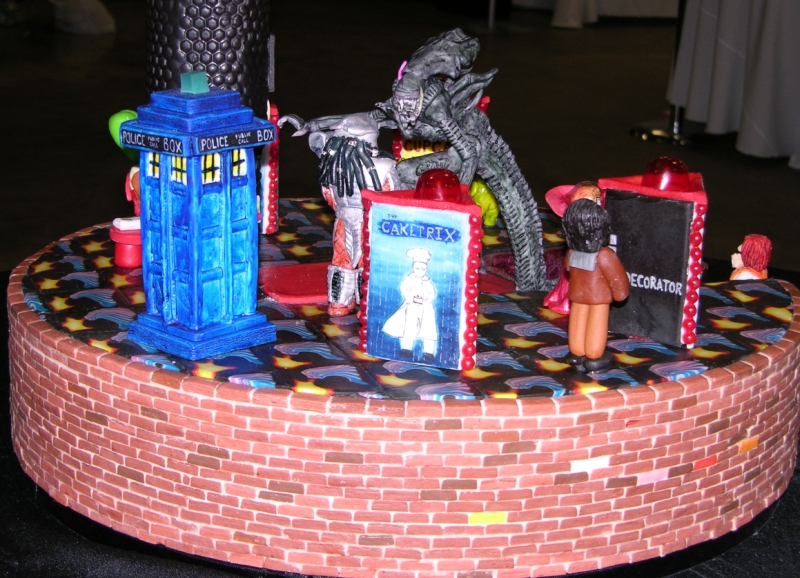
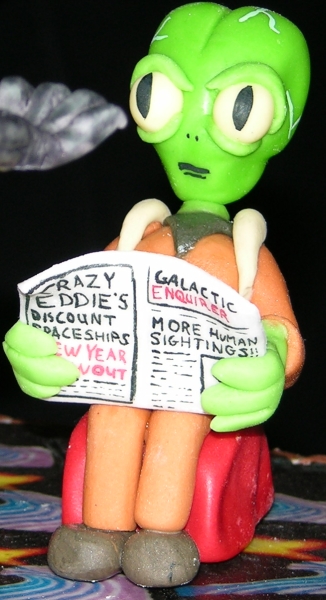
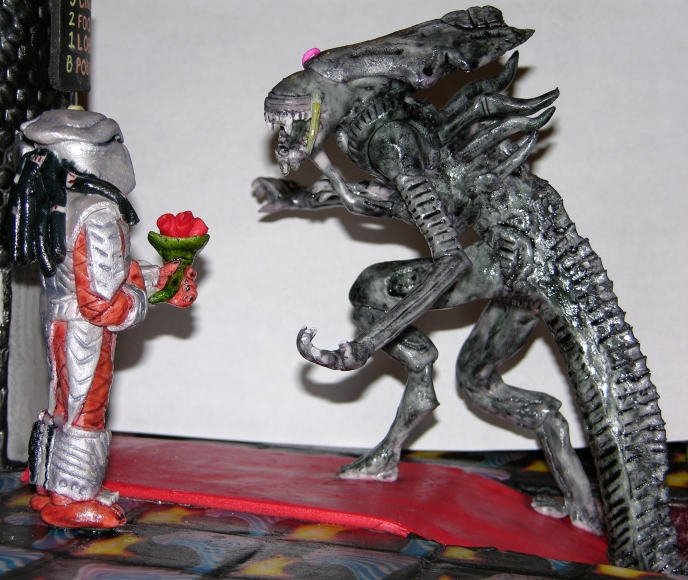
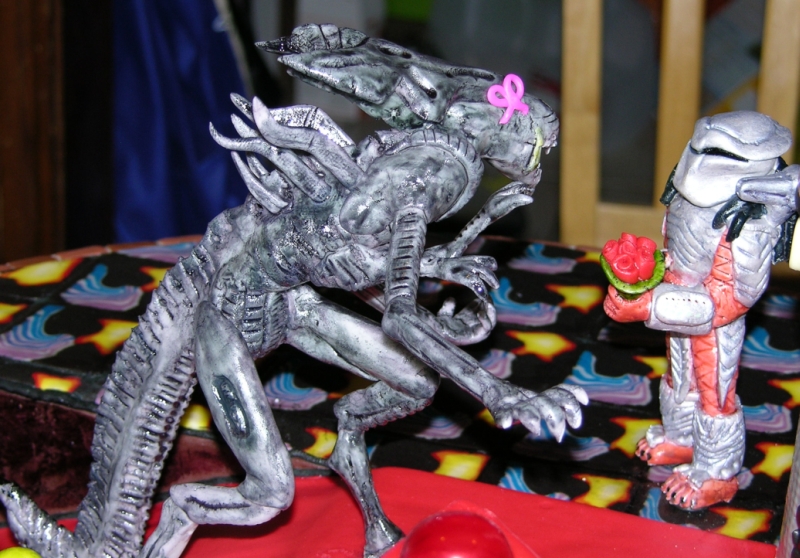
The bottom tier is the foyer for the theatre. At the entrance, Leeloo Dallas shows her multipass to a Man in Black. The Alien Queen is headed up the red carpet to meet her date, Predator, who is offering her flowers. Morbo sits reading a newspaper, while the cute little fanged aliens from Galaxy Quest get excited over a movie poster featuring a giant cupcake. Also checking out movie posters is an ape from Planet of the Apes, and the ambassador from Mars Attacks. The Tardis sits in the background trying to pretend it's just an ordinary phone booth.
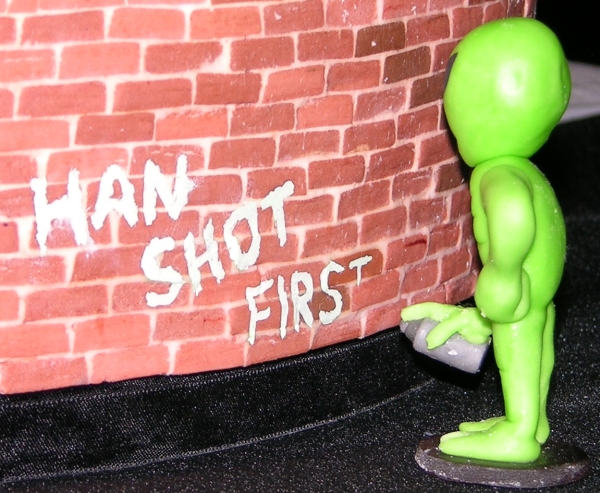
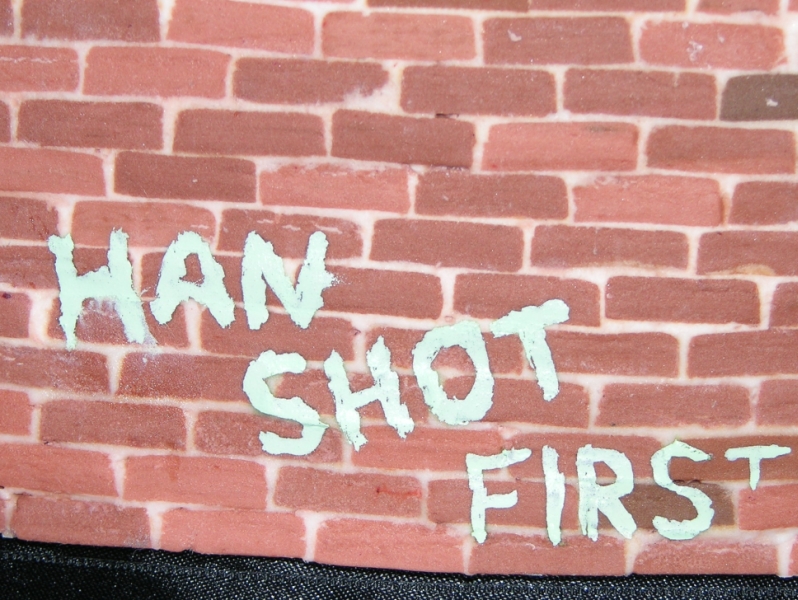
On the exterior brickwork, five bricks are different colours to represent the notes from the alien communication in "Close Encounters of the Third Kind". On the other side, a Little Green Man engages in an act of vandalism to declare that "Han Shot First". Because Han did shoot first.
More views and close-ups can be seen throughout the In The Making section below.

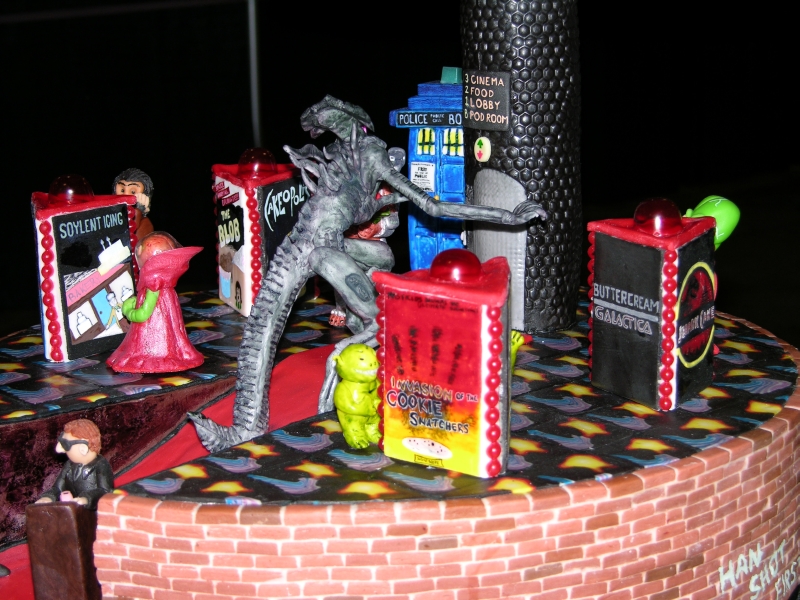
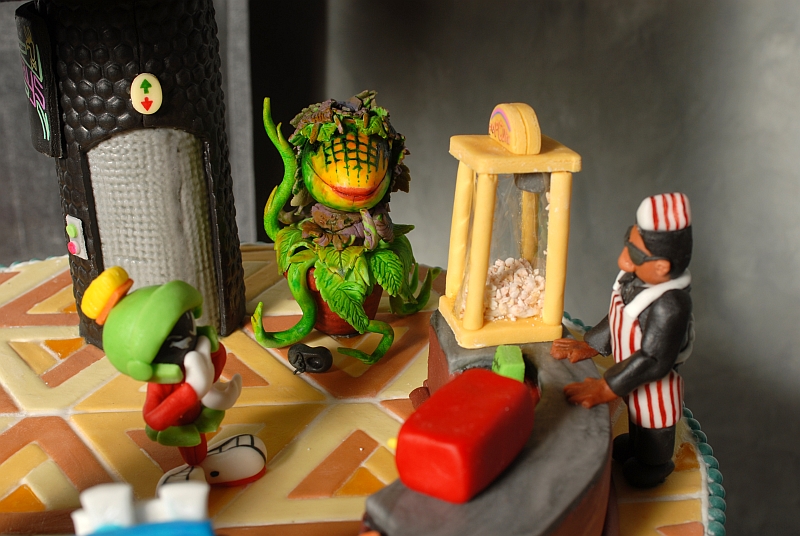
The middle tier is the concession area, run by Milliways. Up top, Marvin the Martian ponders what snack to purchase, while it appears Audrey II has already had one, judging by the single remaining shoe in front of the pot. Another Man in Black doesn't look thrilled to be stuck behind the counter, especially when forced to wear a striped soda jerk outfit. Available snacks are Soylent Crunchies, Reese's Pieces, Stay Puft Marshmallows, Slurm, and popcorn with either butter, Spoo, or Spice.
Diana is headed down the stairs toward the bathrooms because like all Visitors, she's managed to rip her fake skin again. Plus you never know, she might need to add either more glitter or height to her hair.
The exterior is meant to evoke the stereotypical rings seen around buildings and towers in many science fiction shows and movies.
More views and close-ups can be seen throughout the In The Making section below.
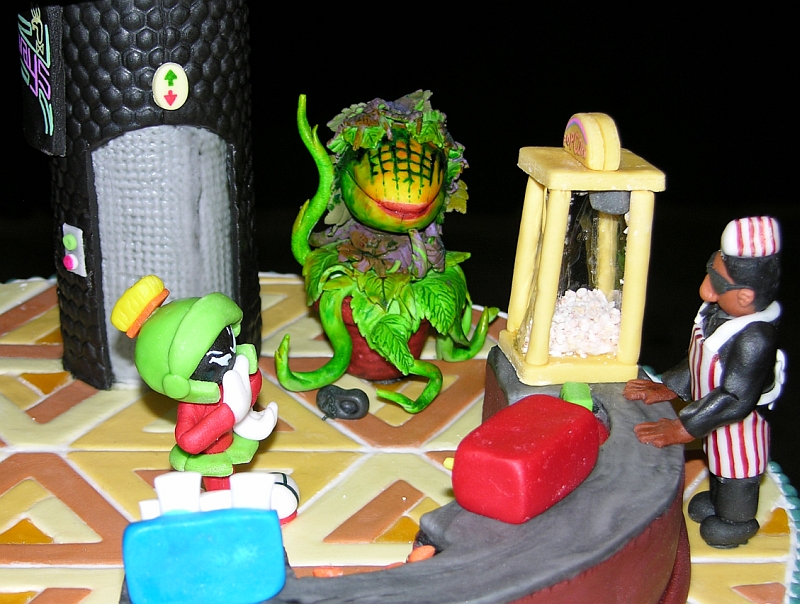

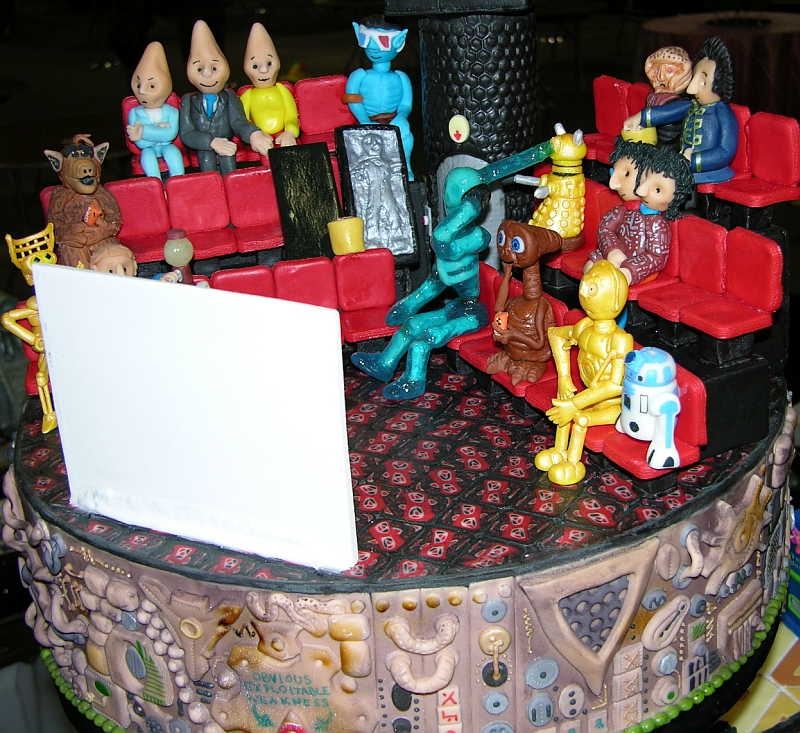
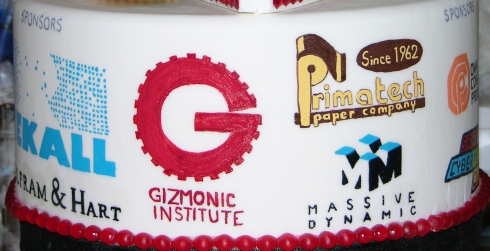
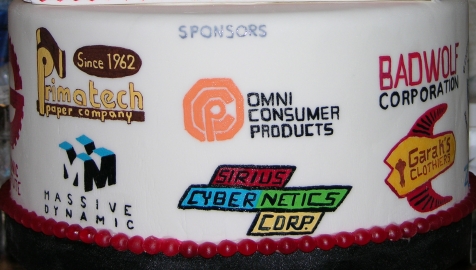
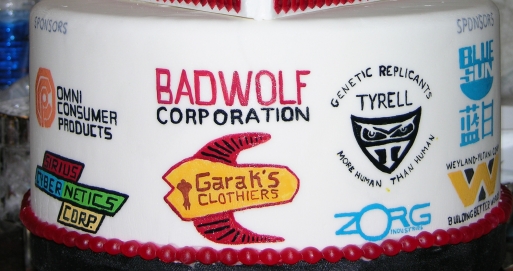
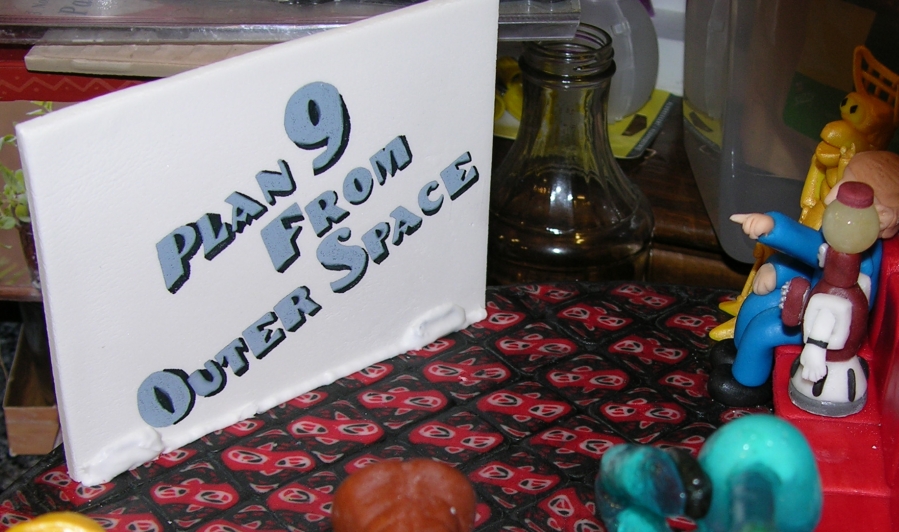
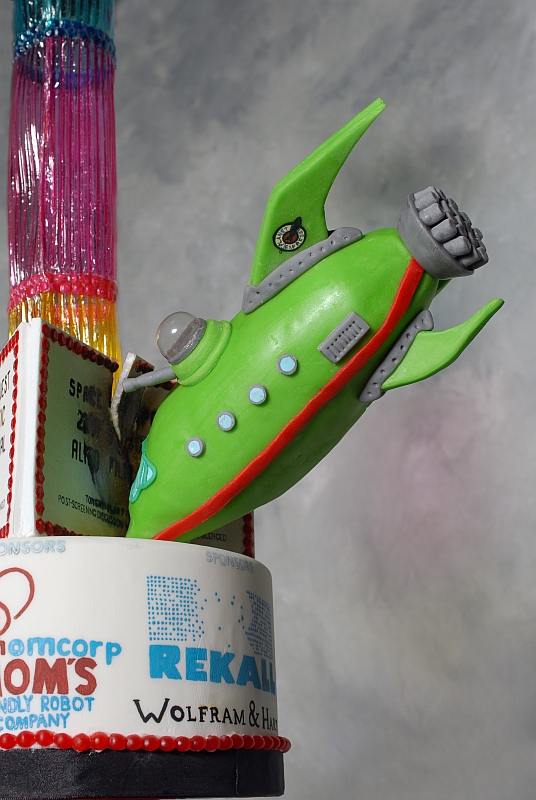
The upper floor is the theatre area, where the aliens have come to watch "Plan 9 From Outer Space". However, their entertainment is about to be interrupted as the Planet Express crashes into the marquee above them. The marquee announces the day's film and discussion, and below it is a banner featuring the logos of all of the evil corporations who are sponsoring the event.
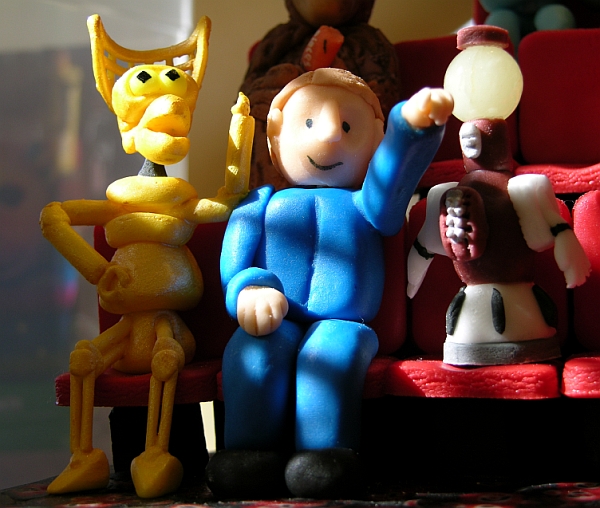
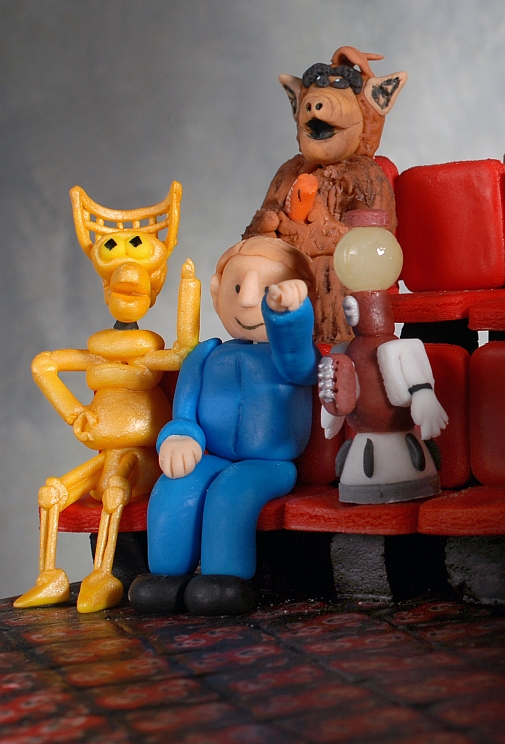
Seated on the left side are the Conehead family, and as usual, their teenage daughter isn't thrilled to be hanging out with her parents. A Na'vi sports a pair of 3D glasses. Alf has some Reese's Pieces, but it's a mystery how the Monolith and Han Solo encased in Carbonite will get to the popcorn bucket they appear to be sharing. The MST3K crew takes on their classic pose in the bottom row.
On the other side, a Dalek is frying another patron for being on a cell phone, which is truly a deserved punishment for talking on a cell phone in a theatre. ET is also eating some Reese's Pieces, and Zaphod Beeblebrox is lucky to have two heads to see around ET's elevated head. C3PO and R2D2 watch the film placidly, but up in the top row, poor G'Kar is distracted by Londo Mollari stealing his spoo-popcorn. Come on, Mollari, haven't the Centauri taken enough from the Narn?
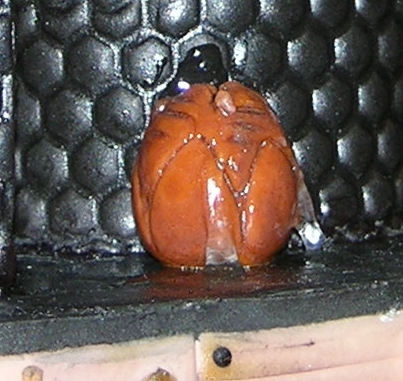
Behind the seats, an Alien egg quietly opens...
More views, close-ups, and details on how some of these things were made are in the the In The Making section below.
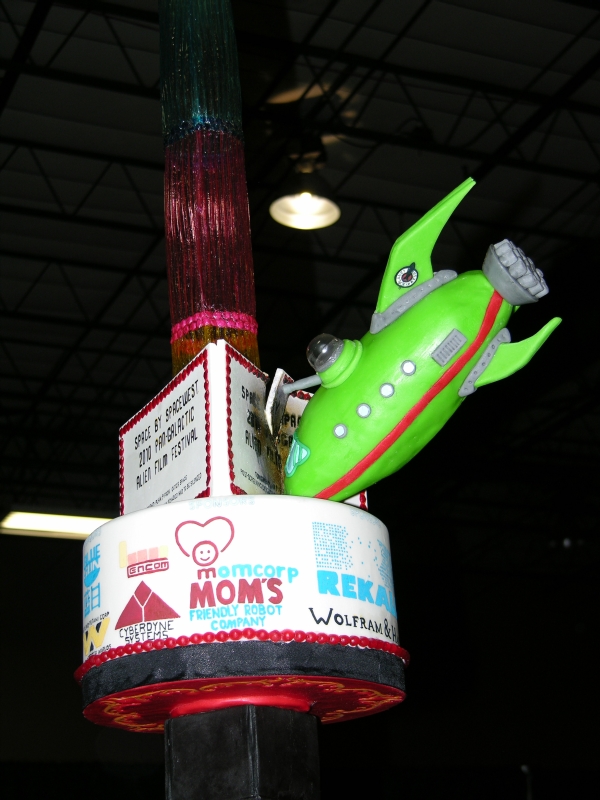
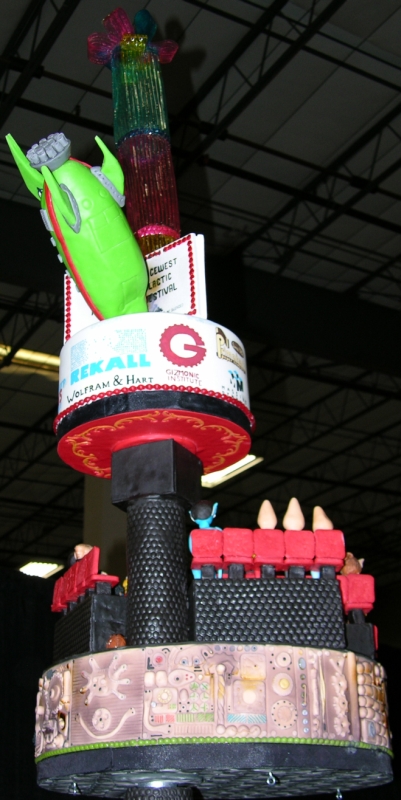
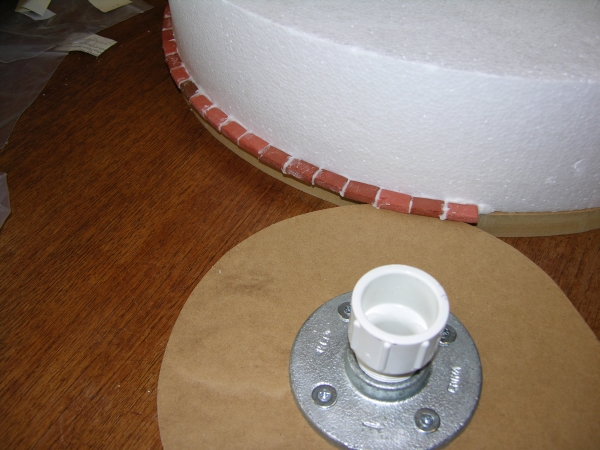
The first thing I had to do in creating this cake was plan out the tiers and the stand. I had never made a stand like this before, so I had to learn about the parts that go into it. My local cake shop cut me four custom boards out of MDF (one 20", two 16", and one 9") and I bought styrofoam cake dummies to match (show cakes are often made with styrofoam dummies to allow for longer decorating times and lighter transportation). At the hardware store, I purchased four floor flanges, four PVC couplers that screwed into those flanges, and a few feet of PVC pipe to fit the couplers. I then measured and cut the pipe to fit my design plan, used a hot wire tool to carve out parts of the styrofoam dummies, and then assembled the stand to get an idea of how things would go together. I used items on hand from around the house to represent things that would be made out of sugar later. Here is what it looked like:
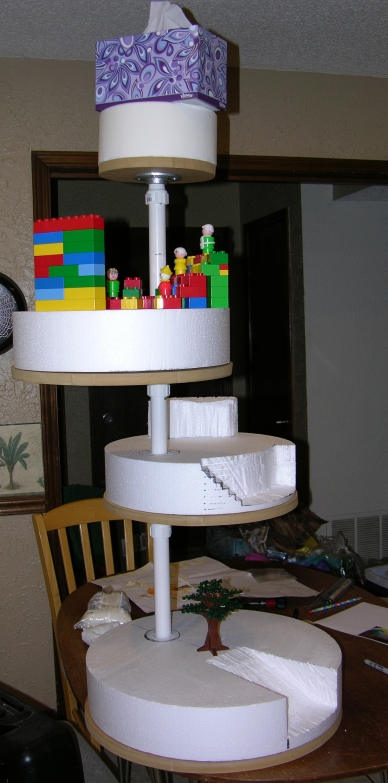
I had already determined that the Duplo pieces were about the right size for the theatre seats, and the Lego tree was about the right size for Alien, so this let me determine that the PVC pipes were the right length.
Then I disassembled it to do the actual construction on each tier, because I knew I'd be transporting it to the show in a Prius, so it had to travel in individual layers.
I worked on multiple things at once, letting one area dry while assembling something else. I had cut out more than 1500 bricks (1cm x 2cm each) out of fondant a couple of months earlier, so they were rock-hard and fairly easy to apply, but the bottom layer had to be supported while the royal icing "mortar" dried. Since the cake boards were all the same height, I used the top board as a support for the bottom row of bricks, rotating it around as they dried on. Once the bottom layer of bricks was firmly attached, I was able to build up the sides quickly.
Meanwhile, I also began cutting lots of tiles out of black, white, and marbled-gray fondant with a triangle cutter. They also needed drying time.
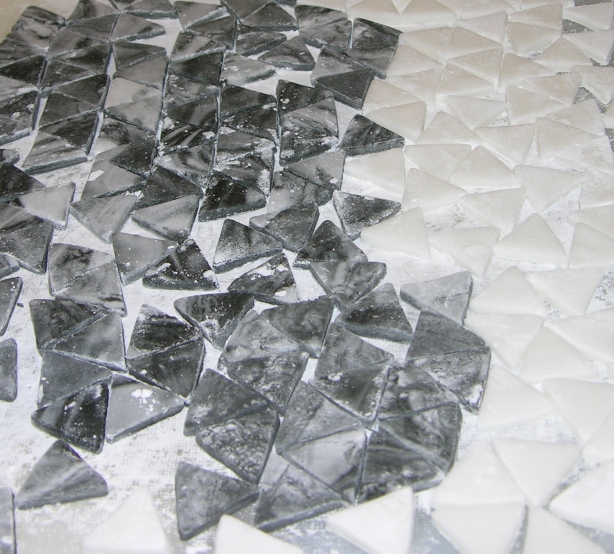
Those tiles were then mounted on the underside of one of the 16" boards with royal icing. Yes, I said underside. I got the message that the judges would look at the undersides of the boards since they'd be exposed, and instead of buying fancy foil like a normal person, I decided to use edible decorations under there. Plus, it gave me the opportunity to practice tiling somewhere that wouldn't be highly visible. That turned out to be a good thing, since I accidentally inverted the pattern partway along (it's hard to spot, see if you can!).
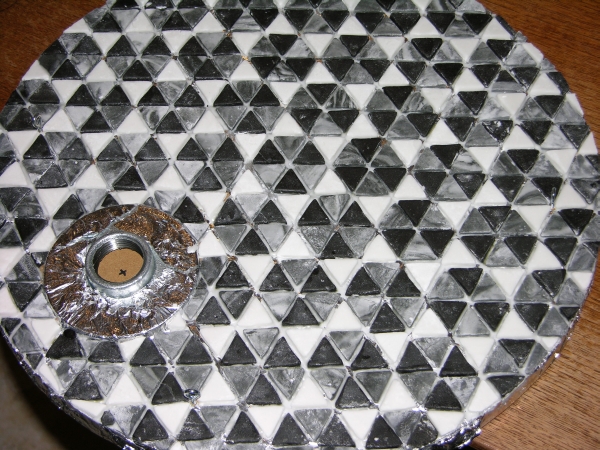
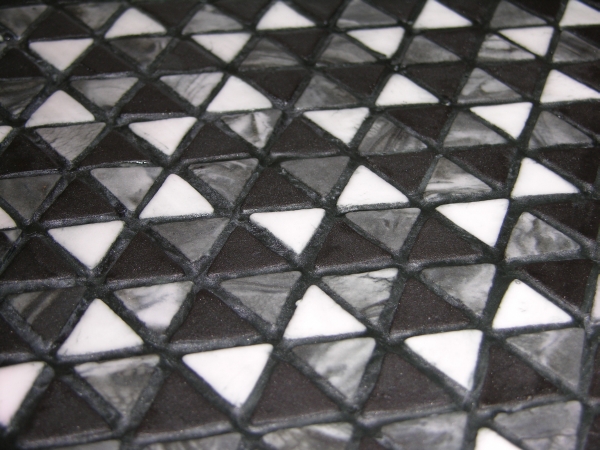
Then I grouted the tiles with black royal icing.
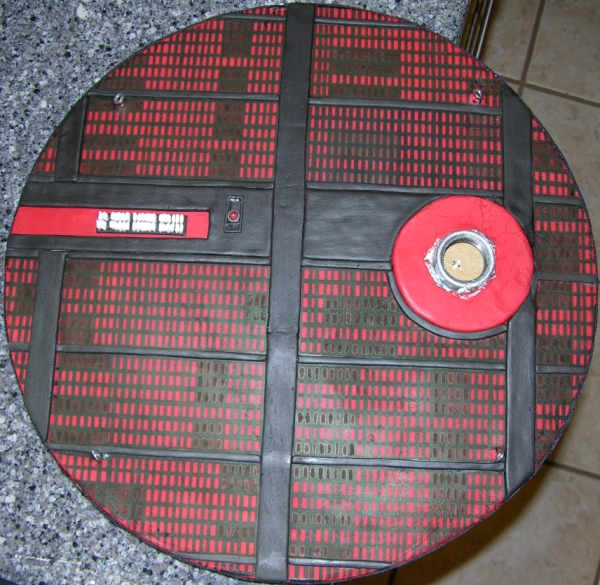
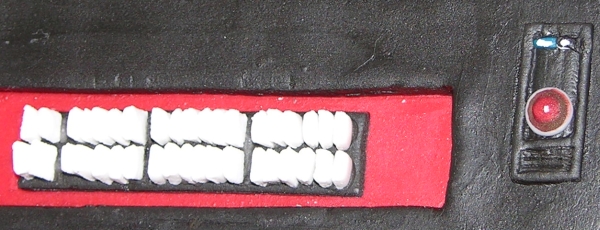
As if tiling the underside of a cake board wasn't enough, I decided to go completely insane and put another science fiction gag under a board. This is Hal's brain room from 2001. I covered the board with red fondant, then used a food-colouring marker to draw in all of the black lines except for the raised ones, which were made out of black fondant and applied after the marker parts were finished. I also added a Hal eye and his brain panel (note that all of the panels are out, which means Hal isn't doing so well right now).
I also screwed in some small eyelets to use as feet so the board could sit above my kitchen counter without sticking and be transported that way as well. I originally intended to possibly hang something from the eyelets somewhere, but plans changed and I didn't. I should have removed them when the cake was assembled at the show, but I forgot. The judges noticed and I lost points for it.
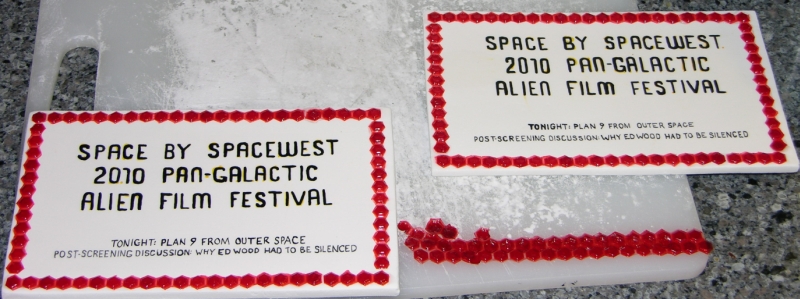
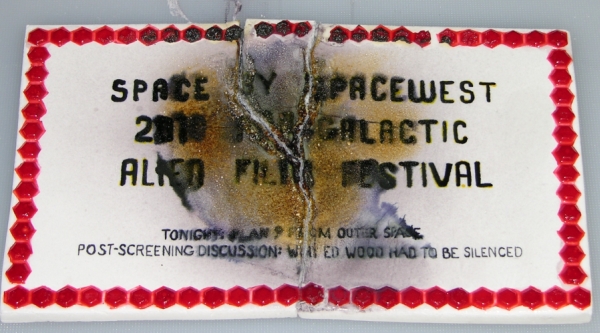
This cake included my first pastillage work. I made these panels for the marquee, painted on the lettering, and then used edible glue to stick on gelatin hexagon strips that I made with a texture mat. Since I knew one of them would fall victim to a Planet Express crash, I chose the one with the weakest lettering work and broke it by hammering a screwdriver into the middle of it. I then used my sugar torch to burn it. It caught fire for a few seconds, which was nifty. Note that burning pastillage and fondant makes your kitchen smell like toasted marshmallows, but burning gelatin makes your kitchen smell like crap!
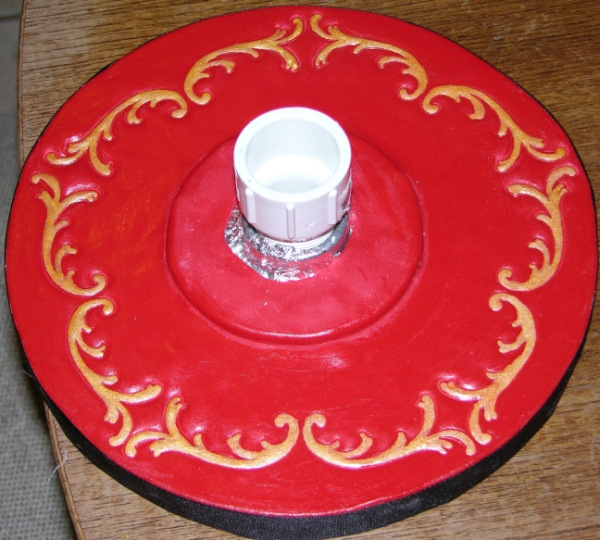
While the panels dried, I put red fondant on the underside of the top-most board, lightly pressed a cutter onto the surface to emboss a design, and then painted the embossed areas with edible gold. I was going for a general theatre-style look.
I mounted the marquee boards much in the same way that one constructs a gingerbread house, trying to keep as much of the royal icing glue hidden in back as possible. Then I gathered as many evil science-fiction company logos as I could find, sized them to roughly the same scale, printed them, and temporarily affixed them to the top cake (covered with white fondant) with tiny bits of tape. That allowed me to plan what went where and be sure that it would fit. Then I painted them on with gel colours.
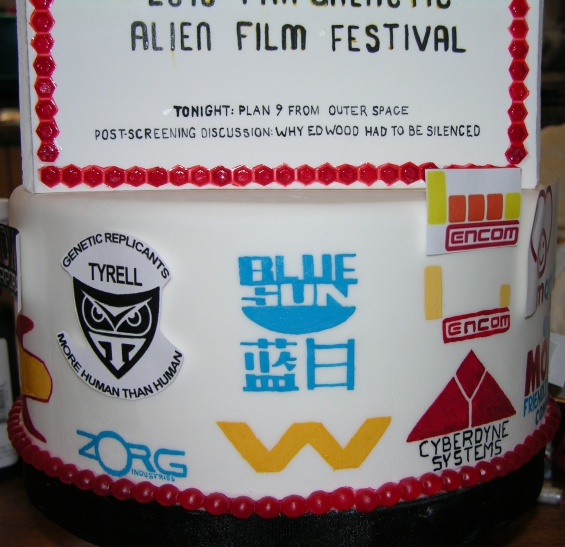
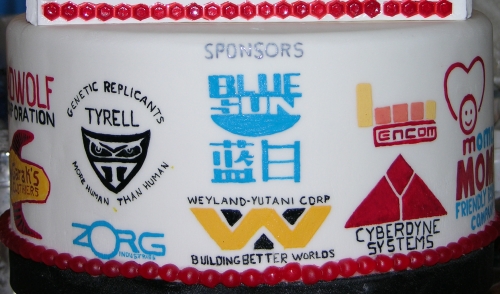
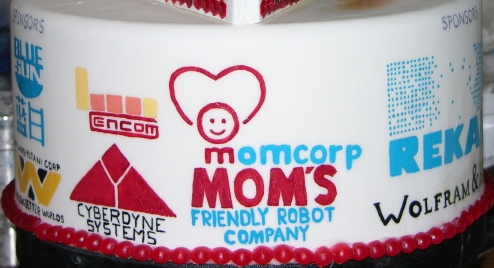
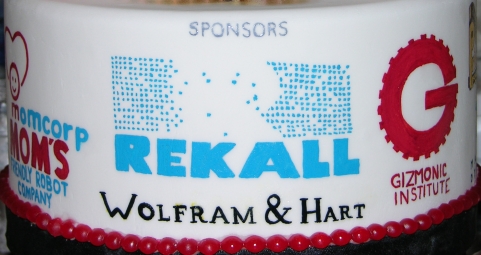
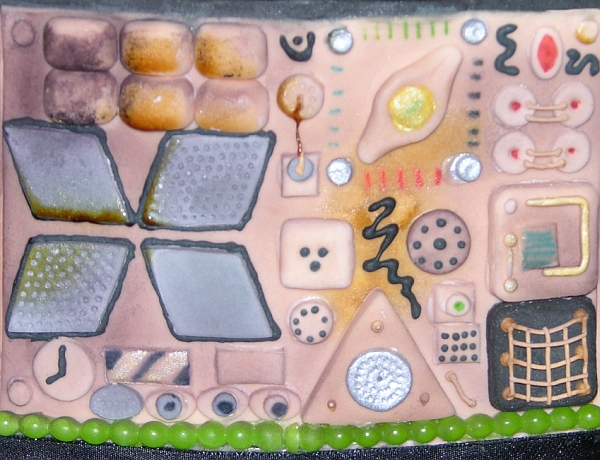
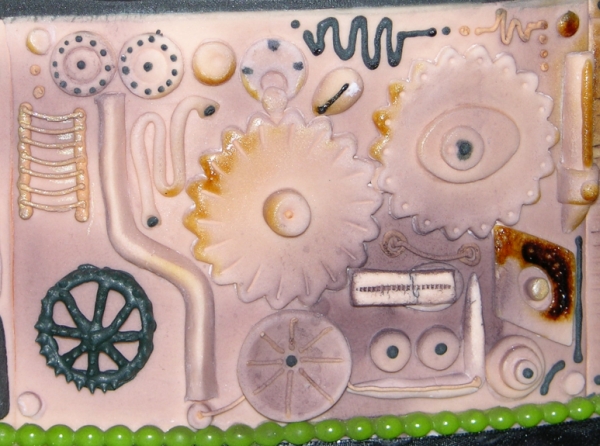
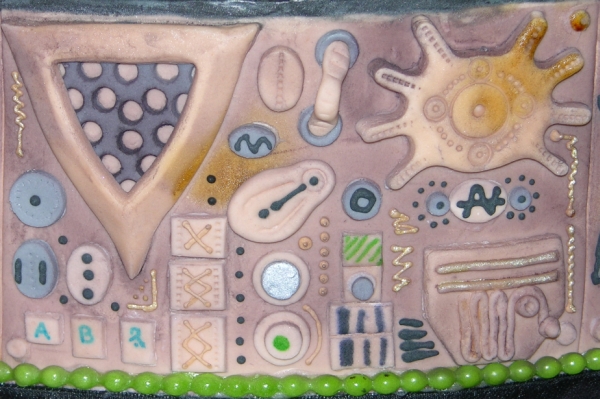
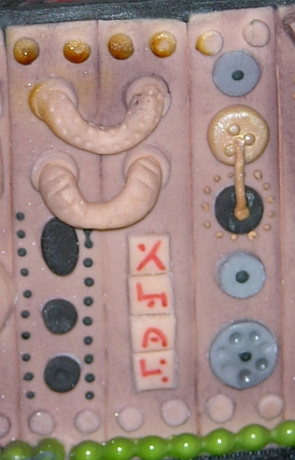
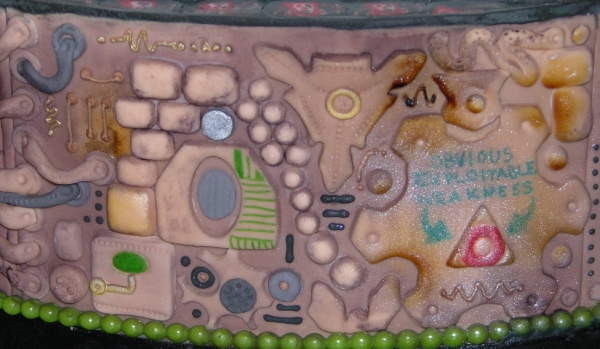
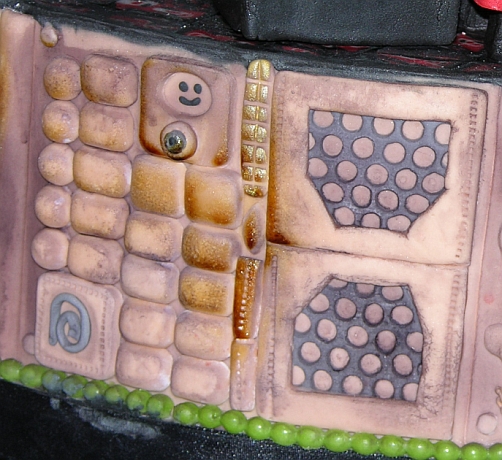
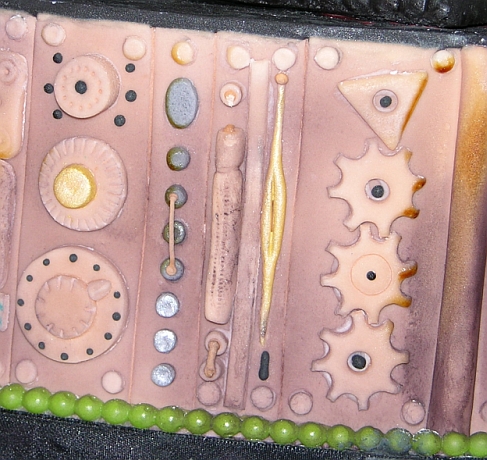
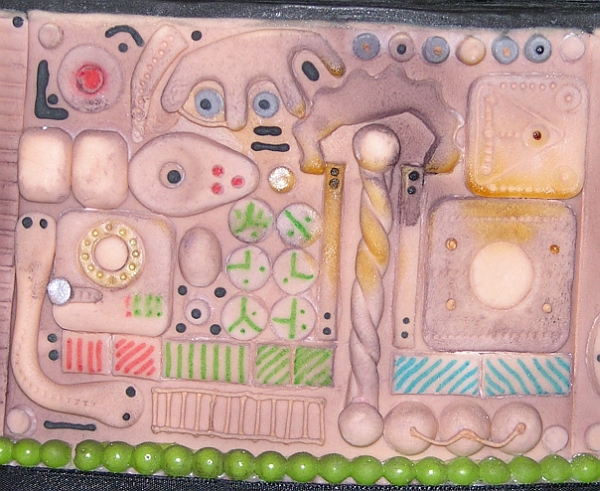
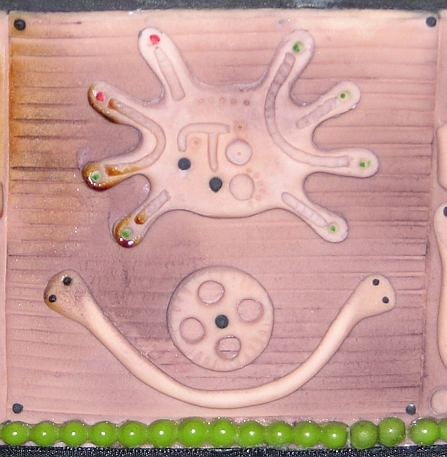
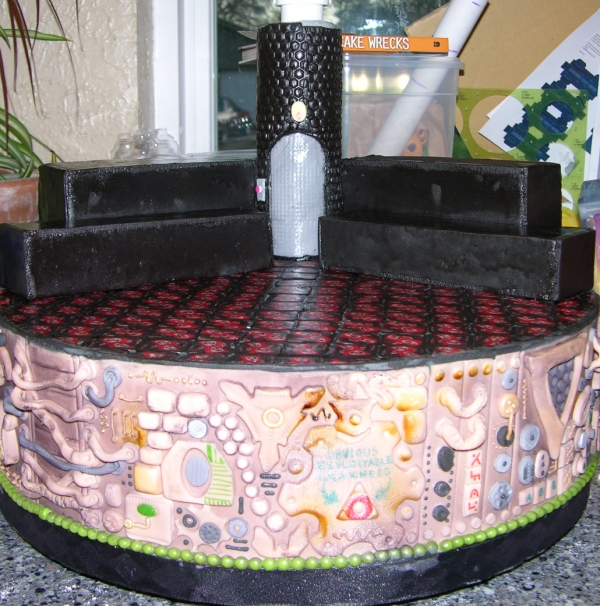
For the theatre tier, I decided to do the sides as if they were somewhere between a spaceship and a machine, perhaps the machine powering the theatre. I made dozens of cutouts with various shapes and sizes and put them on semi-randomly to appear like crowded equipment with presumed functionality, and I piped on some details as well. There are belts, hoses, doors, packs, dials, slides, cables, and more. I made life easy on myself in terms of getting the base covering of fondant around by breaking it into panels and placing rivet-like dots in the corners. This was also my first foray into extension work, which is when you pipe icing between two points but there's otherwise nothing but air in between. I used this technique to make ladders, nets, cables, etc. I also piped some black icing over the underside of a silicone brownie pop pan and let it harden, then removed it from the pan and affixed it to one of the panels to look like a pop-out net-wheel-thing.
Once everything was in place, I sprayed several areas with Wilton's Color Mist spray in black, deliberately hitting some areas harder to give a non-uniform appearance. Then I took the torch out again and made it look like it had been through some intergalactic battles, especially around (but never on) the point of the "Obvious Exploitable Weakness". Foolish rebels, they never hit the target, muahahahaha!
Later, when I was making figures, any time I had leftover silver or gold paint I found a random spot to stick some on the mechanics.

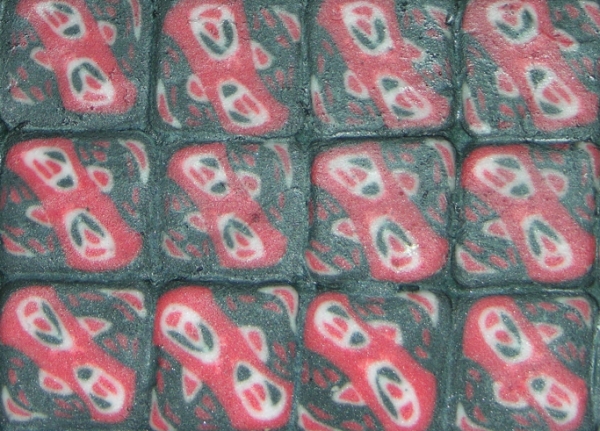
For the first and third tier floors, I tried caning with fondant. Caning is a technique usually used in glass or polymer clay, whereby one builds up a long tube of the medium with various colours inside so that when sliced, each slice bears the same image as the one before. I did one small practice experiment before doing it on the cake, but the theatre floor here was my first big attempt at caning with fondant (but I got called on in a Mike McCarey class to discuss it, which freaked me out!). I went with a random pattern in black, white, and red to evoke the kind of patterns often seen in theatres. After cutting each slice, I rolled it gently with roller guides to make it a uniform height, then cut it with a square cutter (having made the outside with extra black that could be cut off without disrupting the pattern), then placed it on the cake. Once all of the cane tiles were on and dry, I grouted them the same way as I did the previous tiles.
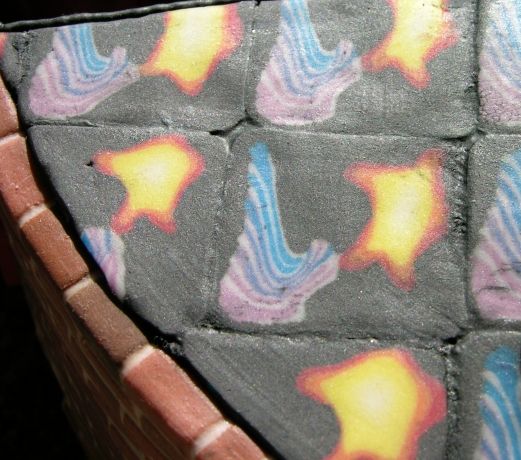
For the foyer, I wanted to make the kind of carpet one sees in real theatres, with lots of busy patterns. I tried to make a star with a Skinner-blend interior, and while the white-to-yellow gradient worked well, the star points did not hold up under cane stretching. Instead, it looks like some kind of cosmic blob. The comet-like tail worked out fairly well, though, with another Skinner-blend between blue and purple interspersed with white layers. Again, each tile was cut, rolled, trimmed, and placed as with the floor above, and then the whole thing was grouted with black royal icing.
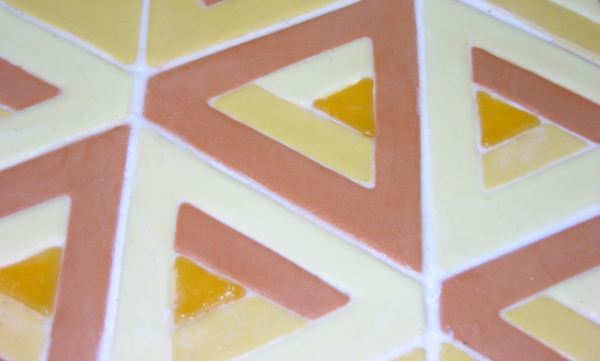
For the middle tier, I tried another new technique that incorporated tiles and grouting: inlay. I cut triangles inside of other triangles in three colours, and then swapped out the pieces in a pattern. The idea was to have these pieces all fit precisely inside one another, but between inexact cutters and drying, they didn't fit perfectly, so I ended up having to grout between them along with the outsides of each large triangle. The smallest triangle in each is made from melted butterscotch candies, warmed in the microwave, torched to lie flat, and then cut with a cutter.
At some point, I added this graffiti to the brick wall using Wilton's White-White with a bit of green gel colour added.
When all of the theatre figures were in place, I added this pastiallage panel with the movie title painted on. I was getting rushed, though, so the royal icing holding it on is messier than I would have liked, and the judges noticed that as well and took points off. I used thick-gauge wire bent into flattened arches and stuck deep into the cake, and put royal icing over that. If I had had more time and if on-site assembly had been more feasible, I would have only put royal icing underneath and left that to dry with supports in place, then removed the supports.
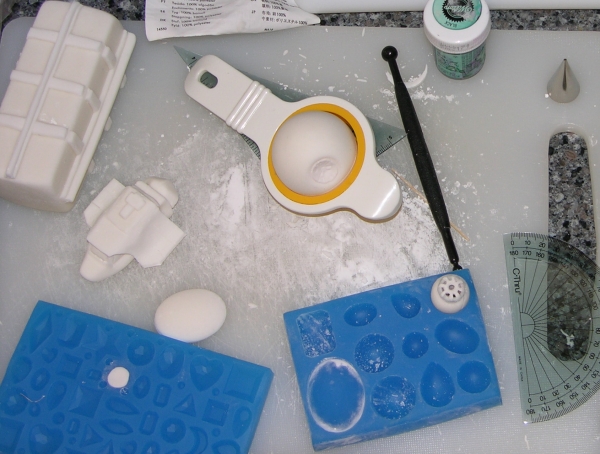
The ships are all made out of fondant/gumpaste, usually with white and then painted later. Here's a board with several works in progress: the Tardis in the upper left, the Visitor Transport beside it, the just-moulded top half of the Enterprise's saucer section, the Death Star drying in an egg separator to keep its bottom round, and the centre of a Tie Fighter that has just had its front "window" put on (I tried rolling gumpaste to make that shape at first but ended up having to do it as extension work with royal icing):
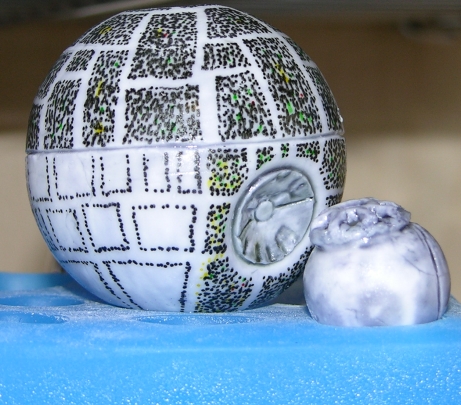
The Death Star was then painted lightly gray, and then marked all over with dots from food-colouring pens. It took forever to do, so when I had to rest, I put it on this mould to stay stable. You can also see the Tie Fighter again beside it.
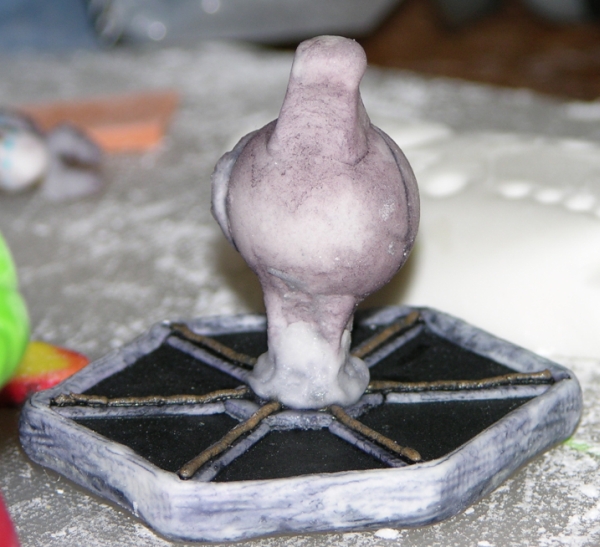
Here are two shots showing how I put the Tie Fighter together, first affixing the centre to one already-dried side panel, and then the other. My daughter thought the first stage was supposed to be a pigeon, and I can sort of see that. You can see the Martian Ambassador drying (before his gelatin bubble-helmet was added) beside the Tie Fighter in the second shot. The gel colours are holding the Tie Fighter stable while it dries.
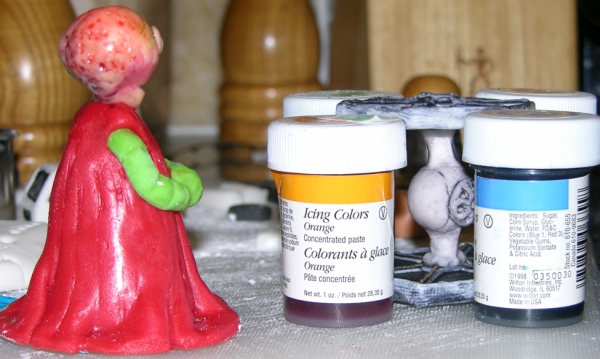
Here are some more completed ships that didn't get good photos at the actual show. The Enterprise needed a base because it kept tipping forward from the weight of the saucer section.
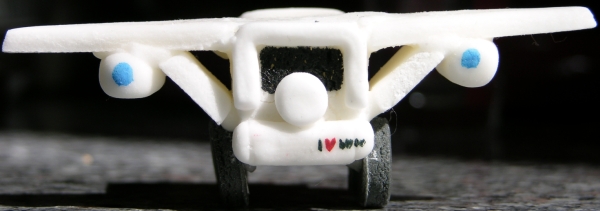
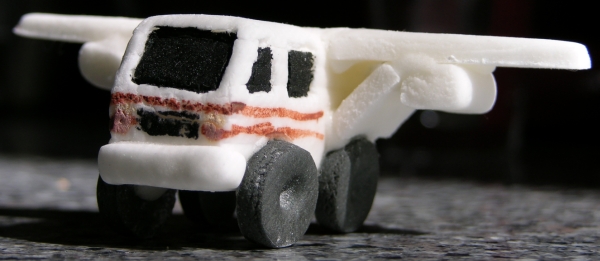
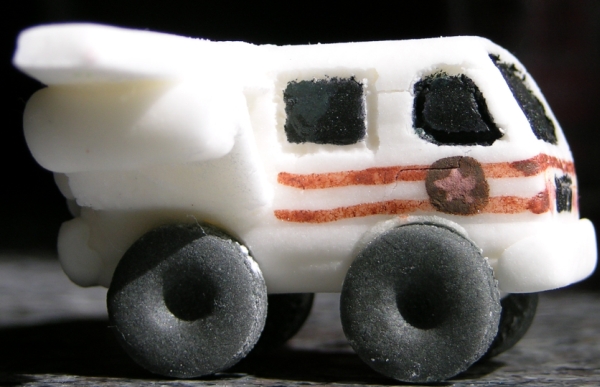
Here you can see some pieces of figures and ships drying. The egg-like thing with leaves will become Audrey II, and the black things are Tie Fighter panels. The blue bits in the corner were part of Babylon 5.
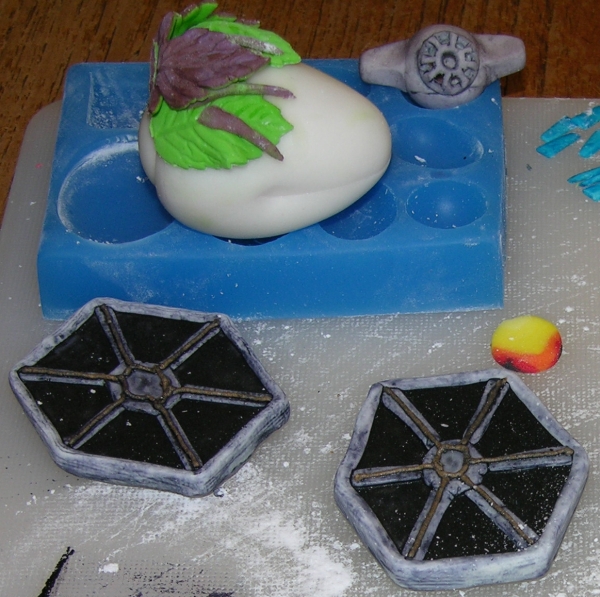
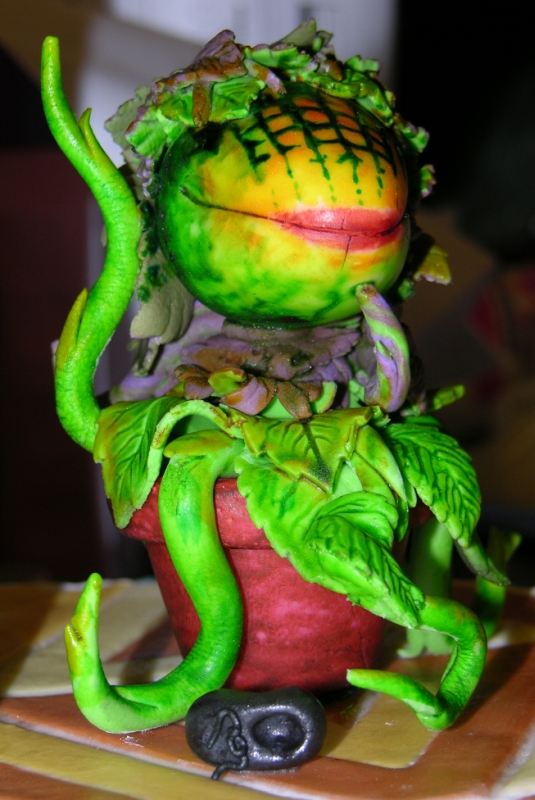
Audrey II's head was then placed on the vines coming out of a little pot I'd made and dried earlier, and then covered in leaves made with a combo cutter and vein-stamper. Some leaves were cut out of two-tone fondant so they'd be green on one side and purple on the other. The "face" details were painted on. Here it is still wet from that and other highlight-painting:

Here's Audrey II on the cake, with a shoe at its base to imply that its just eaten someone:
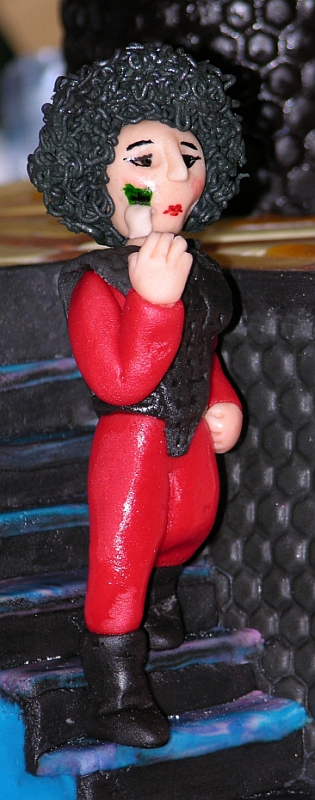
This is Diana, the Visitor leader from V, with her tell-tale skin ripping off. She wasn't supposed to look like Cher; that was an accident of construction. She also turned out too large, especially once I piled on the big 80s hairdo (which was done by piping stiff royal icing through a #1 tip).
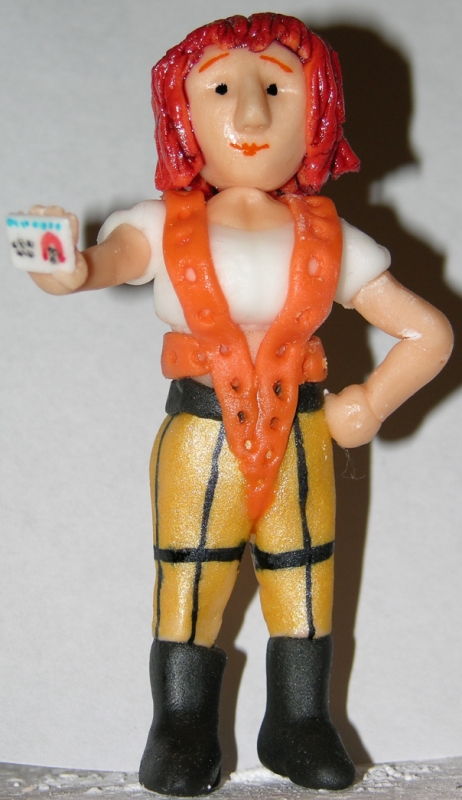
Here's Leeloo as she dries, holding her multipass. She turned out a bit more voluptuous than I intended.
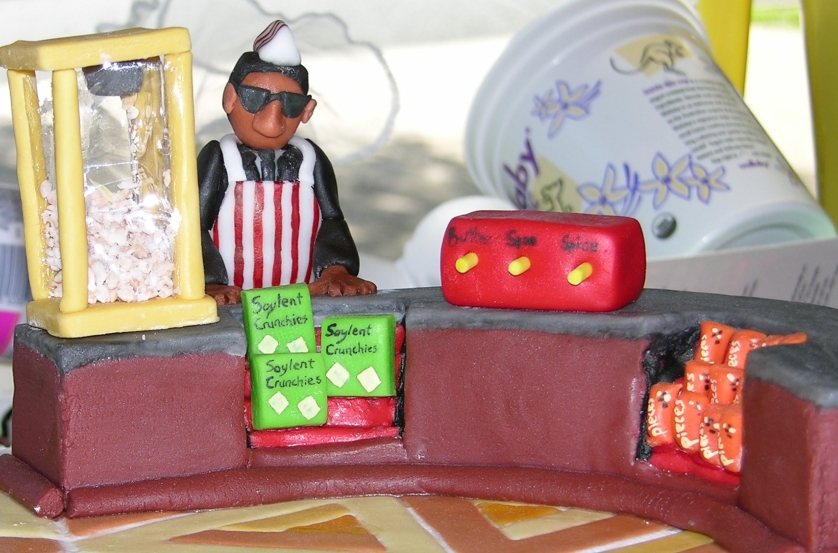
Here's the snack counter with the MIB in his soda jerk outfit. The top of the popcorn machine isn't on yet, but you can clearly see the gelatin walls, which were made simply by pouring warmed, clear gelatin on a flat plastic surface (the square bubble I saved from one of my daughter's toy packages) and letting it dry, then cutting it as needed. The popcorn is white and brown fondant roughly mixed, then chopped up and left to dry. The counter was made with a crushed-foil interior and covered in fondant. The Slurm machine is also crushed foil with fondant over it. I was very happy with how the Americolor Electric Pink royal icing stood out perfectly for the Slurm logo.
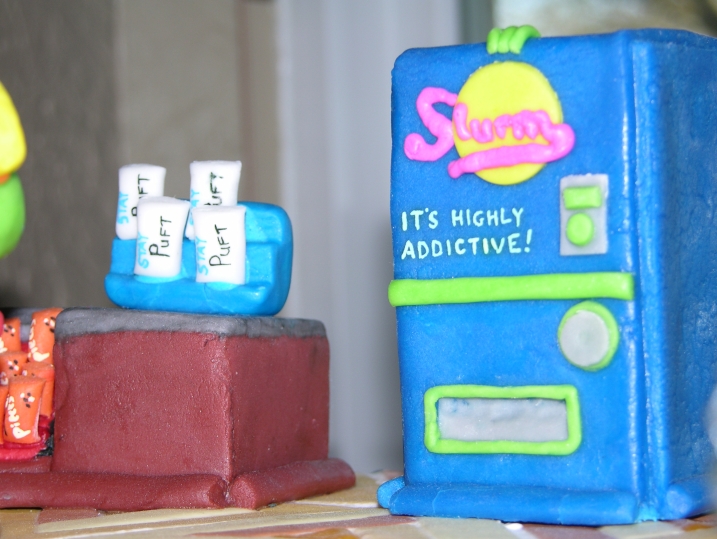
This is what the snack boxes and packages looked like before they were mounted on the counter:

My first attempt at the Alien Queen started with toothpicks as inner supports, but those legs crumbled when I attempted to build them onto a body, so I had to start over and make a wire armature. I then built her up section by section on the armature, with her arms and spiny bits made separately on toothpicks and allowed to dry fully before adding them to the body. You can see how I make use of what ever is around to support delicate parts while they dry into place.
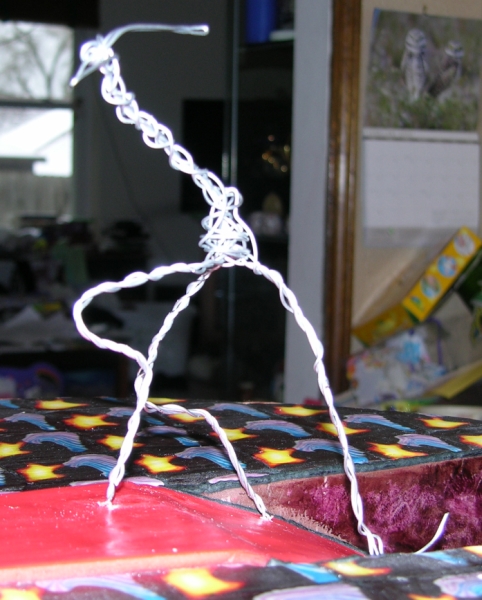
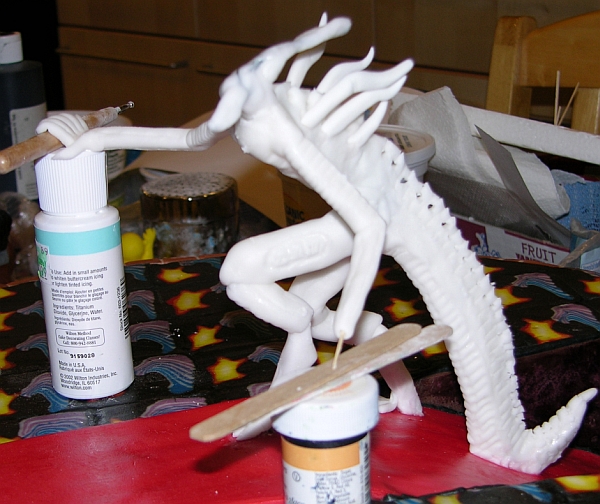
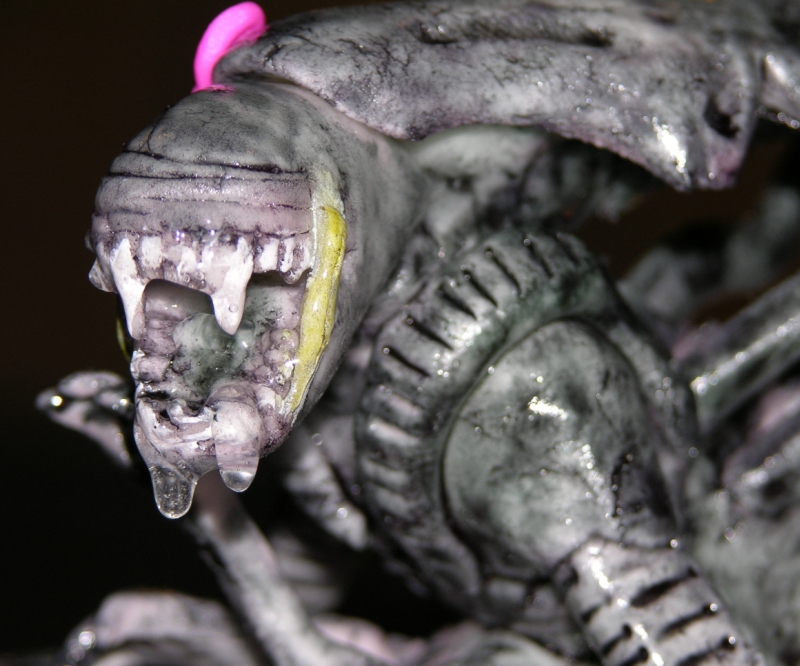
After I moulded on her face and placed the pre-made and dried headpiece, I painted her with diluted black food colouring gel. Once that was thoroughly dry, I mixed some yellow with some White-White to highlight her jaw tendons, and added a bit more White-White over her teeth to make those more clear. Then later I added piping gel for the drool, which stayed formed in rubbery drips and made me very happy. I added a pink bow to the side of her head because she's on a date with Predator, and even scary carnivorous Alien Queens need to get their pretty on now and then.
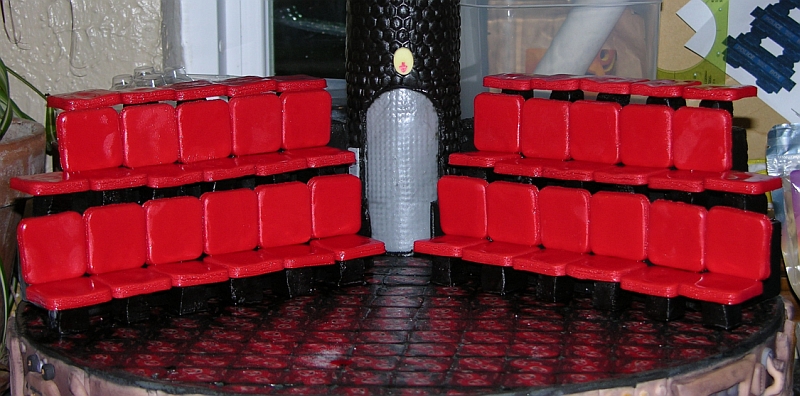
Here's a series showing how I built up the theatre. I first covered some styrofoam blocks with fondant (because they could have been made pretty easily with cake), then added pre-dried seats that were propped up on little black cubes. Then I added the backs, using red royal icing where they weren't otherwise supported. Then I built the characters up from legs to head, except for those that involved other methods like melted candies.
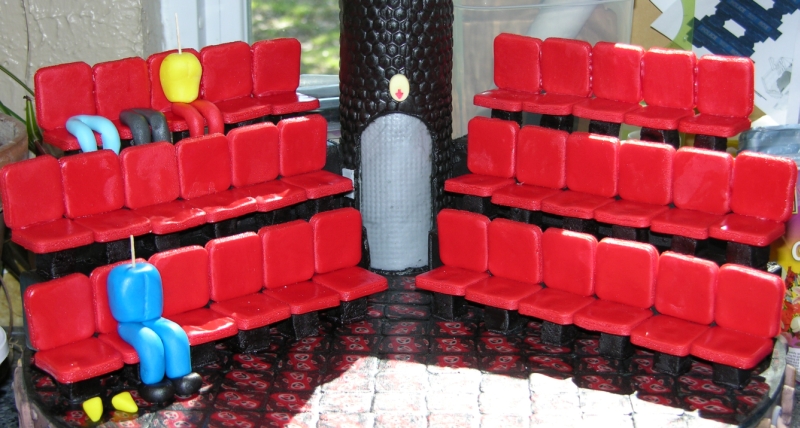
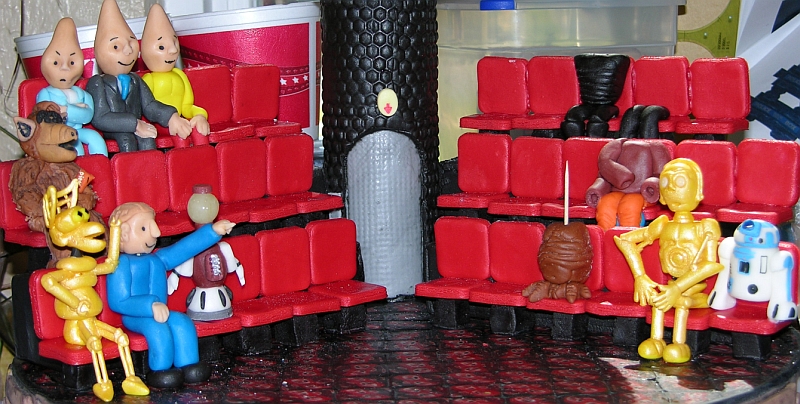
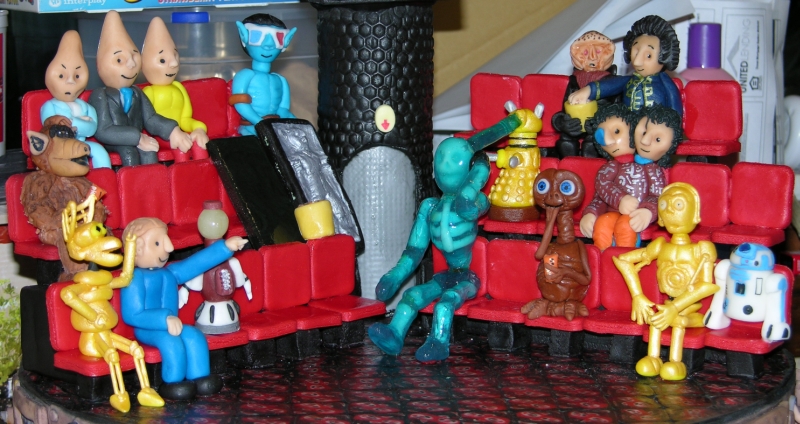
Here are some detail shots of the figures in the audience before the screen was put on, including one of the sun hitting the MST3K guys which shows the translucency of Tom Servo's head (which was made by melting a Life Saver in the microwave and rolling it into a ball).
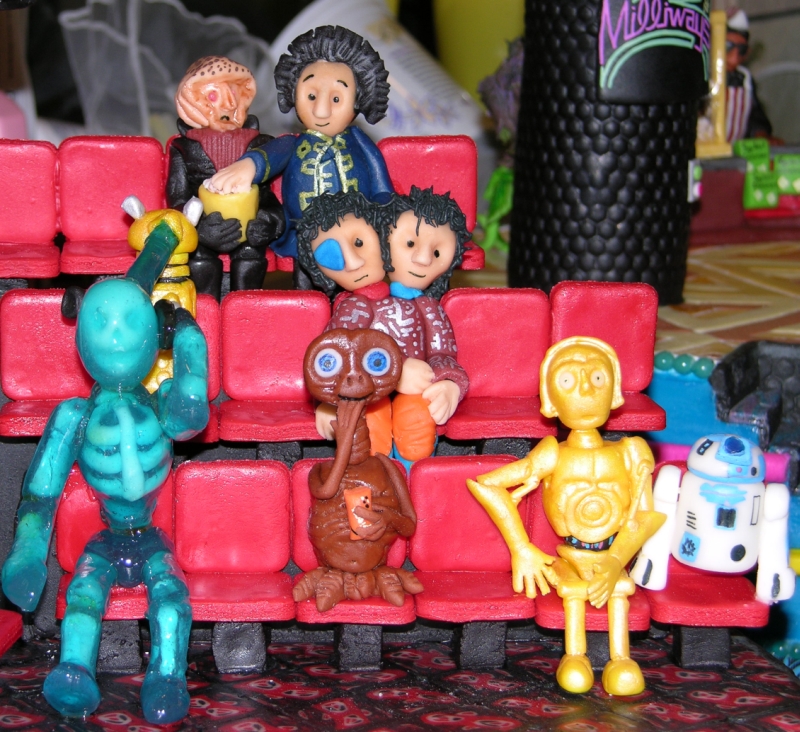

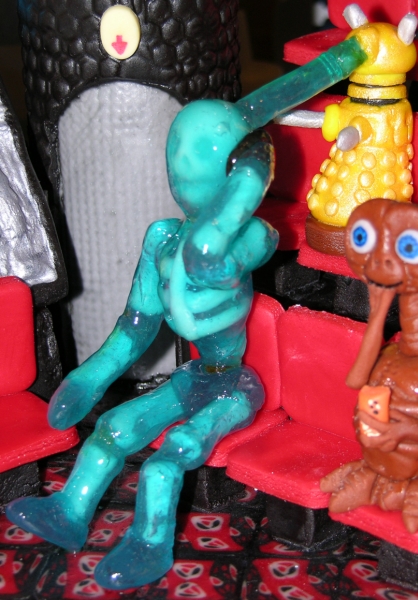
The Dalek victim was made by making fondant bones which were then allowed to dry thoroughly, then melting blue Jolly Ranchers in the microwave, wrapping them quickly and carefully around the bones, and then lightly torching them. The space behind the ribs was made by first making the spine, then putting a piece of the blue candy against it and building the ribs over that.
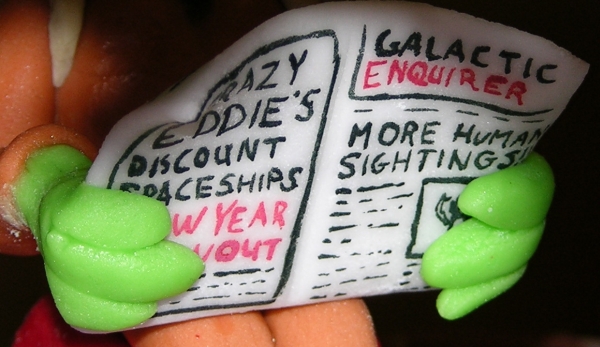
Here are some close-ups of Morbo's newspaper:
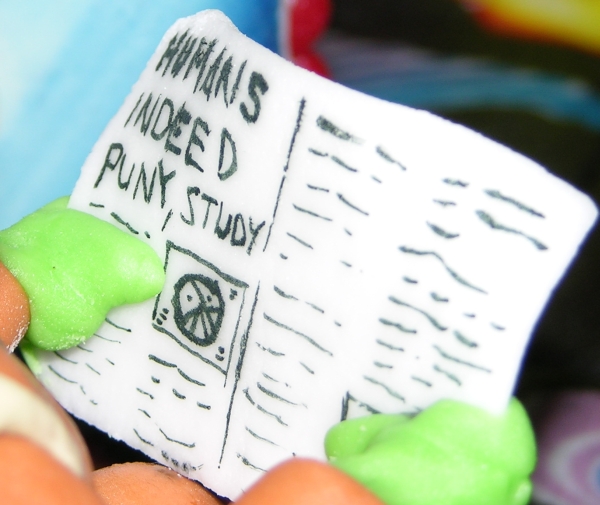
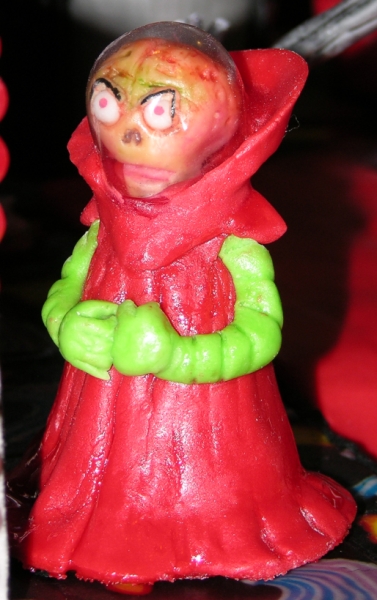
Here's the Martian Ambassador with his gelatin space helmet on. I finally got it sealed all around and then realized I'd forgotten to put on his teeth. Heh. Oops.
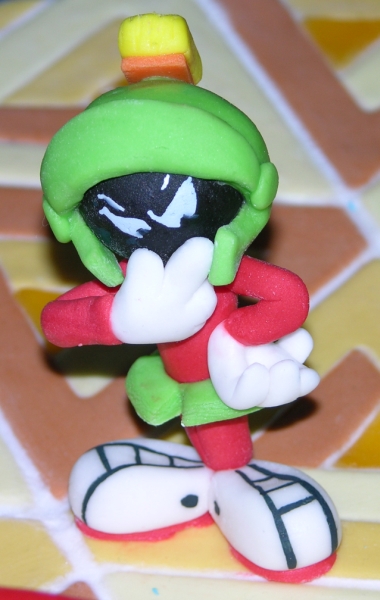
Here's Marvin the Martian just after I added him to the cake. Discovering the White-White has made it much easier to paint details like his eyes, which previously I would have had to model and mount separately. Marvin was tricky because of his heavy head on such a skinny body, especially at the ankles, so he took a lot of time to carefully model around toothpick supports.
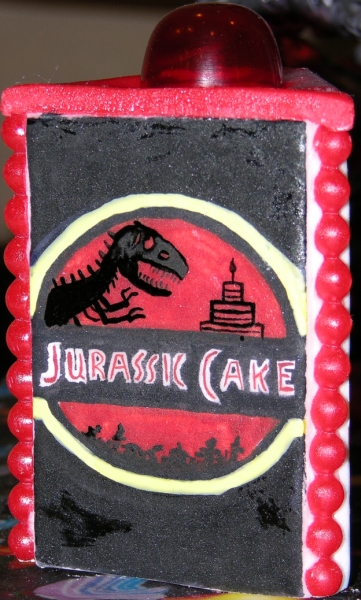
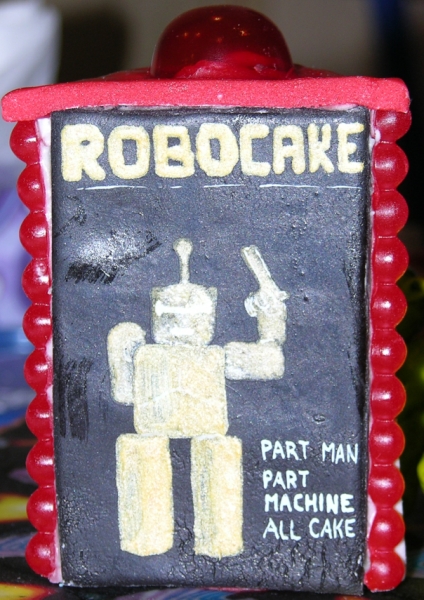
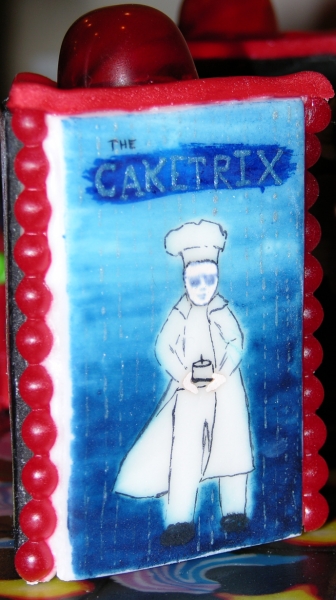
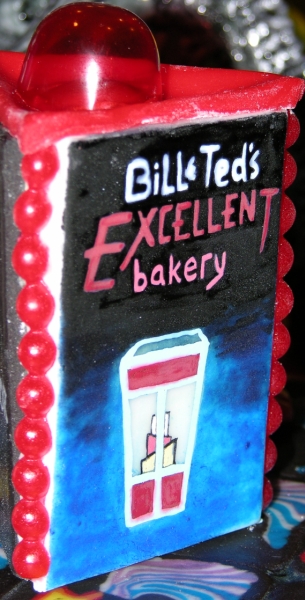
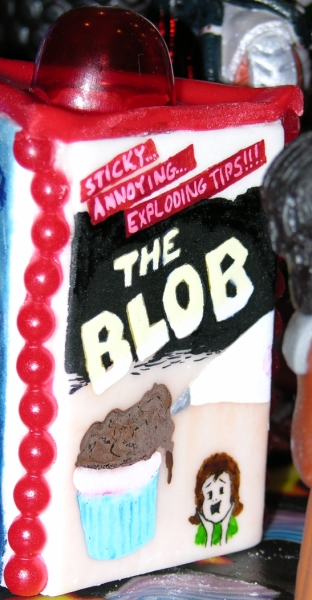
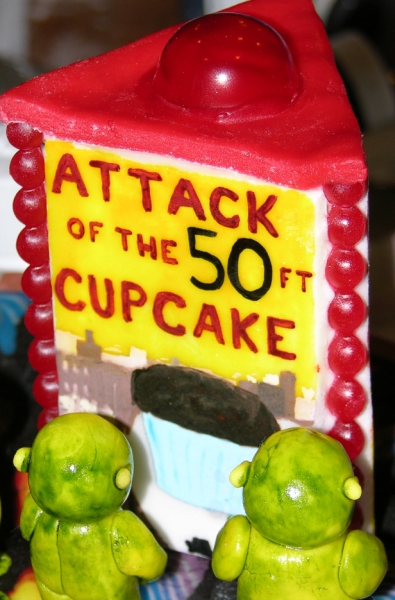
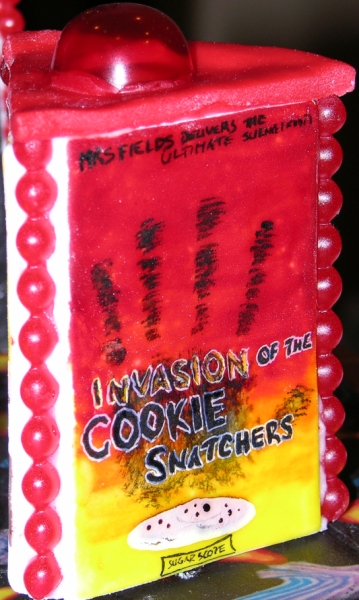
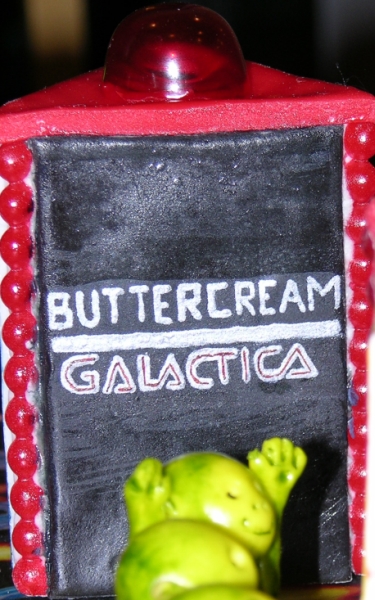
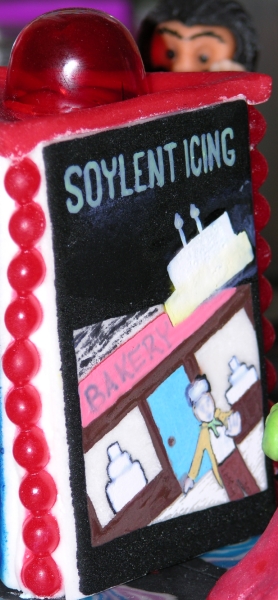
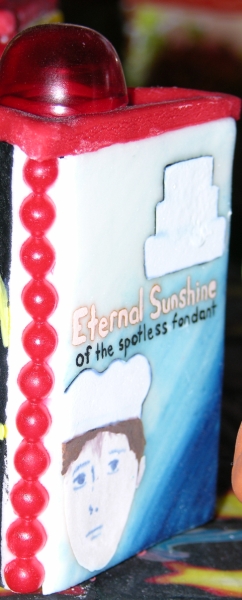
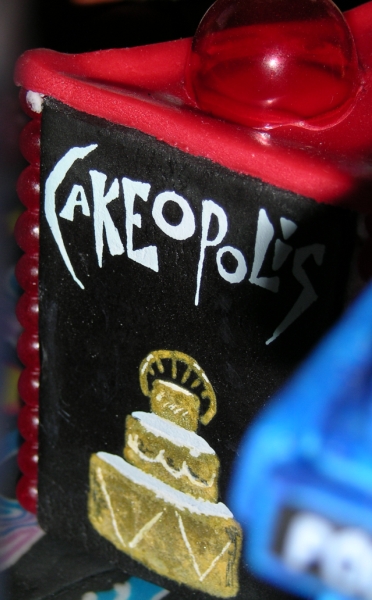
The movie signs with cake jokes are all based on real movies, and the real posters/logos I found using Google image search. They were painted with food gel colours onto flat bits of fondant, then assembled around a core of fondant-covered aluminum foil. Then I added some gummy beads up the sides, a red fondant top, and a red gelatin bubble (which is the same mould as used for the Martian Ambassador's helmet and the turret on the Planet Express).

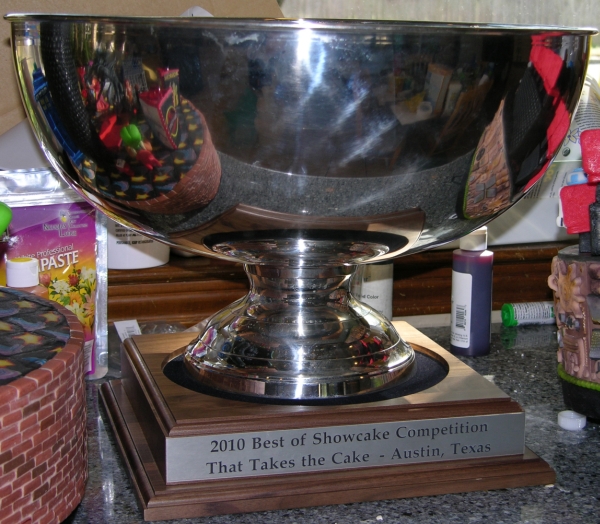
Here's the fabulous trophy I won with this cake, seen on my kitchen counter with the cake sections on either side. I also won a medal and a really cool bag full of cake decorating tools and supplies, plus a $250 cheque. Yay!
Here are the best of the professional photos that were taken:

Main Cake Page - Cake Gallery - Discworld Tutorial - Orc Head Tutorial - Shelob Tutorial - Books - Links
Don't like my colour and font style? View this page in your default settings.
Page last updated March 3, 2011.
Email me at crafts@kimberlychapman.com
If you want to receive notification of updates on any portion of this site, simply enter your email address here and click/select the button to enter. You will be required to sign up for a free Yahoo! account to complete registration. Please note that Yahoo!'s privacy policy and other management are outside of kimberlychapman.com's responsibility. Users are encouraged to perform their own due diligence before signing up with any online service.
To find out more about the list or read messages without signing up, please visit the Yahoo! page for the kimberlychapman updates mailing list.
For more information on what these tags mean, please see About KimberlyChapman.com.